Recipe: Paleo Bacon Burgers

IMG_9016

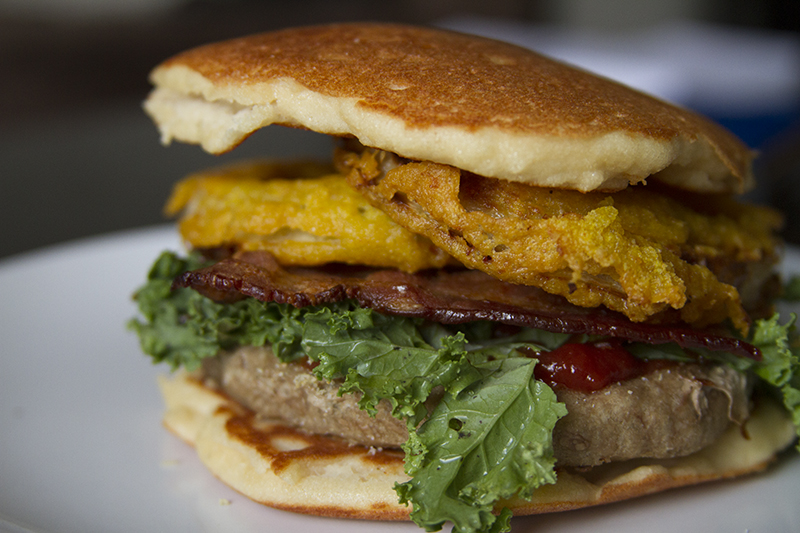
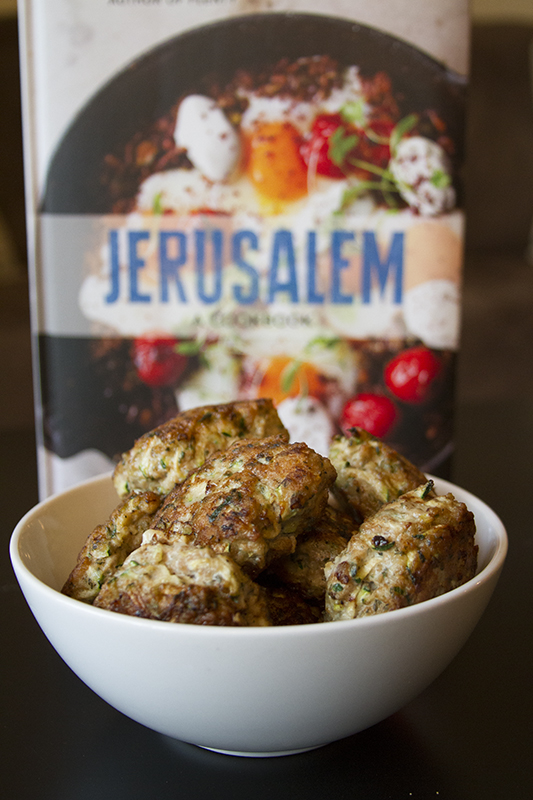
One of my favorite questions that people ask when they learn about my diet restrictions goes something like “My goodness…what CAN you eat?” Well, as regular readers probably know, you can eat just about anything (you just need to work a bit harder for it). The picture above should be evidence of that!

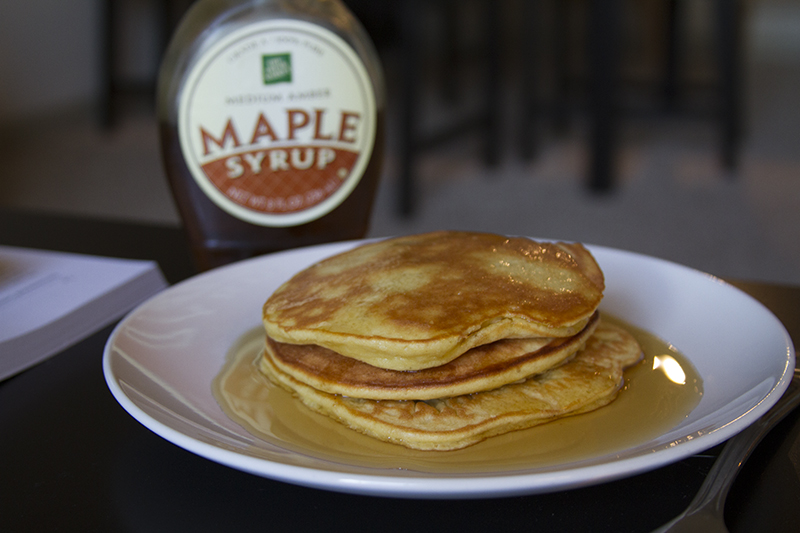
This weekend I was traveling, and despite my best efforts I did go hungry a couple of times. So I wanted to make tonight’s dinner a feast of fantastic proportions to counteract my lean weekend. I rediscovered some Applegate Turkey Burgers in the freezer and decided that tonight would be burger night. After a pitstop to whole foods to pick up some nitrate-free organic Applegate bacon, I set to work. Making turkey burgers is no easy feat when you need to make pretty much everything from scratch (the only thing that I had pre-prepared was the frozen patties). I had to make the ‘buns’ (which are just pancakes) and the onion rings from scratch. I’ve provided the recipe for the onion rings below (the pancakes can be found here. Incidentally, I replaced the eggs in the pancake recipe with egg whites. The pancakes were lumpier, but much lower in cholesterol and still tasty). As for the fillings, get creative! Add whatever you’d like!

Gluten-Free, Paleo Onion Rings (you know, except for the fact that cavemen probably weren’t frying things):

1/4 cup Almond Flour
2 tbsp cocolunt flour, sifted
1/4 cup arrowroot starch
1/2 tsp granulated garlic
1/8 tsp turmeric
2 eggs (substituting egg whites doesn’t work very well)
1/2 cup coconut milk (I used water because I didn’t have coconut milk. You may need a little more)
Frying oil
2 onions, sliced into thin rings

Instructions:

Place the flours, arrowroot, and spices in a medium bowl, whisk to combine. Add the eggs and coconut milk (or water). Whisk until smooth. If the batter is too thick, add additional coconut milk for desired consistency.

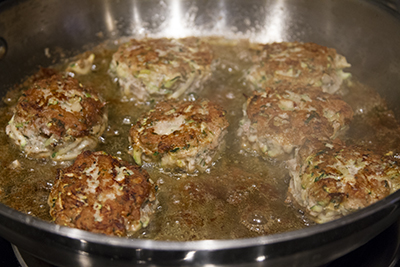
In a large non-stick skillet, heat enough oil to come half way up the sides of the onion slices to 330 degrees. Coat onion slices into batter, shake of excess batter, and place into hot oil. Cook each side for 2 minutes, then remove with tongs an set on a paper towel to remove excess oil. Enjoy!

Recipe: Paleo Burritos

IMG_9005

So, the world keeps knocking me down as far as baked goods go. By retreating back to the Paleo diet and avoiding all grains completely, I am now limited to almond flour and coconut flour in terms of baking tools. While I’ve seen some pretty creative recipes for solving the tortilla dilemma (one of which involved food processing cauliflower, adding egg, and baking that in a tortilla shape), all of them posed an intrusive flavor. And then, my boyfriend mentioned to me that Jimmy John’s (the sandwich company) offers a bread-free sandwich called an ‘Unwich.’ Basically, they wrap your sandwich ingredients in lettuce! While Jimmy Johns would likely continue to be unsafe for a celiac, the idea is genius! So I tried to apply it to an old standby: tacos and burritos. And I must say, it works beautifully! Depending on which type of lettuce leaf you use, you can lump all of your taco ingredients into a good sized leave, fold it just like you would a tortilla, bite into a crunchy outer ‘shell,’ and enjoy!

Here’s my basic burrito recipe (free of nightshades, which still cause headaches and hives in my case). It is grain-free and legume-free (as are all Paleo Dishes), but I couldn’t resist adding cheese in. I seem to tolerate it pretty well, so what the heck?

Ingredients (to make 3 burritos):
For Meat:
1lb chicken breast (cubed) or 1lb ground beef
Cilantro
1/2 tsp Salt and Pepper
1 tsp Cumin
1 tsp Garlic Powder
1 tsp Onion Powder

For Guacamole:
1 avocado
1/2 clove garlic, chopped
1/4 yellow onion, diced
1 lime
Salt and Pepper
1/4 tsp Cumin

1 slice American Cheddar Cheese, cut into strips (this is what I had on hand!)
Lettuce (Kale and Romaine both work nicely, but you could probably use anything you have lying around 🙂 ).

Instructions:

Make the Guacamole first. Gut the avocado until you’re left with only the green meat, and place in bowl. Add the juice from 1/2 a lime, the chopped garlic, and the diced onion, and mash together (works best with 2 spoons). Once mashed, add salt and pepper to taste. Cover and refrigerate until ready to add to burrito. (Note: traditional guacamole recipes call for jalapeno peppers and tomatoes. Feel free to add these if you don’t have a nightshade intolerance).

For chicken, you’ll need to slice the chicken into small chunks and season the small chunks while they rest on a plate. For ground beef, you’ll need to place the 1 lb chunk of ground beef in a mixing bowl, season, and then mix the meat with your hands. Add all seasonings to meat, and then transfer meat to a hot, greased skillet (over medium heat). Cook until done, and set aside.

Cut your slice of cheddar cheese (Aged white is my preference!), into strips. Serve everything on a large plate, and allow the person eating to assemble their burritos.

To assemble, use a spoon to place two dabs of guacamole onto the center of a lettuce leaf. Use the back of the spoon to spread the guacamole evenly. Add your meat directly on top of the guac, and cover with cheese strips. Wrap, and enjoy! I know they’re simply, but they’re positively delicious.

A final thought, if you use Kale, you might be looking at a $5-foot-long burrito 🙂 (pictured below)

IMG_9009

Recipe: Paleo Pancakes!

IMG_9004

I’m not sure if you, readers, have noticed this or not, but I’m just a tiny bit stubborn. When forced with having to give up all of my favorite, glutenated foods, I more or less just say “Nope, I’ll find a way around it.” As you might imagine, these workarounds don’t always turn out wonderfully (especially when they’re of my own making!). I’m happy to say that these pancakes do not fall in that category. They are absolutely delicious when topped with maple syrup (or any other topping, I would imagine).

This recipe comes from a FANTASTIC book called Paleo Indulgences. Oddly enough, they’re actually part of a recipe for a Bacon Burger! The pancakes serve as the bun for the burger in that recipe. I have a couple left over, and I’m planning to use them as bread for a Paleo frozen breakfast sandwich trial (stay tuned!). Anyway, I’ve made a few things from this book now, and these pancakes are my favorite thusfar. They taste delicious, and, like most baked Paleo goods, have a pleasant flavor of coconut to them (trust me, I never liked coconut until I was forced to, and these were good). They’re fairly easy to make, and much more filling than normal pancakes. Good luck, and enjoy!

Maple Pancakes (or, Maple Pancake Buns!)

Ingredients:

Dry
1/3 cup (30g) almond flour
3 tbsp coconut flour, sifted (you really must sift coconut flour, or it will be too clumpy)
Salt (a pinch)
1/2 tsp baking powder

Wet
4 eggs
1/2 tsp pure vanilla extract
2 tbsp pure maple syrup
2 tbsp coconut oil, melted

Instructions:

Heat a griddle or skillet to 350 degrees (low-medium). Place the dry ingredients in a bowl and whisk. Combine all wet ingredients except coconut oil in a separate bowl, whisk to combine. Add the wet ingredients (not the coconut oil) to the dry ingredients, and combine lightly. Once the contents of the two bowls are mixed, add the coconut oil and mix well (you’ll need to aggressively whisk to get the clumps out of the almond/coconut flour). Grease the skillet with either more coconut oil or olive oil spray, and spoon batter onto the skillet/griddle in 3-4″ circles. Allow to cook until the top of the circles bubble and the edges begin to curl upward, then flip. Cook for 2 more minutes (until both sides are browned), serve and enjoy! This recipe made 5 small pancakes, and can easily be doubled.

Recipe: 4th of July Chicken Fingers

IMG_8975
Hello Readers! So, on National Holidays, we as a nation gather to commemorate this or that major event over hot dogs, burgers, and some form of fried chicken. So today, on the Fourth of July, I really just wanted some chicken nuggets. You might think that a highly restricted, Paleo Diet might get in the way of that timeless cook-out dish, but it hasn’t! May I present to you my Paleo Chicken Nuggets, which are baked and lightly “breaded” with almond flour. Not only are the allergen- and Paleo-friendly, but they’re a healthier alternative to anyone who enjoys this time-honored treat.

Ingredients:
1lb Chicken Breast, cut into slices (for fingers) or cubes (for nuggets)
1 cup almond flour
2 eggs, lightly whisked
Salt and Pepper to taste
1/4 tsp Garlic
1/4 tsp Onion Powder
1/4 tsp Cumin
Any other spices you’d like to add! (you could add cayenne or paprika if you’re not nightshade-phobic, like me!).

Instructions:
Preheat oven to 400 degrees. Combine Flour and all spices in a bowl, mix well. Once you’ve cut the chicken into your desired shapes (you could even pound the breast and use cookie cutters to make fun Dino Nuggets!), dip each strip into the bowl of whisked egg. Once coated in egg, toss the chicken in a bowl filled with the almond flour and spices. Spray a cooking sheet lightly with olive oil, and place strips on the sheet. Place the sheet in the oven for 15 minutes. Once the 15 minutes are up, turn the broiler on your oven to Low, and broil the nuggets for 5 minutes. Turn over, and broil the other side for another 3-5 minutes. Let cool for 2 minutes, serve with your favorite sauce, and Enjoy! Happy Birthday America!

Update #4: The Epilogue

Well, readers, it’s been almost two months since my last full-length update on my condition. As I mentioned previously, I did have quite a bit of luck after switching to the Paleo Diet. However, as many short sighted patients do once they start feeling better, I abandoned my “medicinal” diet too quickly. Here’s what happened:

Once I went on the Paleo Diet, I kept a food journal for about a month. This helped me pinpoint nightshades, gluten, vinegar, corn, and canola oil as foods that would provoke hives. I highly recommend keeping a food journal to anyone who’s having symptoms similar to mine. I have a hard enough time keeping track of the nearly 15 different problem foods now that they’ve been identified! Without the food journal, I never would have been able to pinpoint what exactly was making me sick. I know this, because I am once again sick, and I have stopped keeping my food journal.

Fortunately, I don’t have hives. The foods I listed above seem to be the only foods that bring on those devilish itchy bumps. However, those old, familiar symptoms of gastrointestinal distress have creeped back into my daily routine. I haven’t kept my food journal for about 2 weeks now, so I have no way of pinpointing what the issue might be. Because if this, I’ve found myself eliminating foods randomly and without precision. Needless to say, I haven’t gotten any better. I eliminated dairy, which mildly improved my symptoms for a few short days. However, the gastrointestinal distress continued to worsen, until this past weekend when things were nearly as bad as they used to be. I made the decision to go back to the Paleo Diet simply because I was lucky enough to have experienced how much the diet could improve my well-being. So, I went back to what worked.

It’s been a couple of days since the switch back to the Paleo Diet, and I am slowly improving. I believe that I was experiencing something called Gluten Cross-Reactivity. I even wrote a post about it before deciding that it could possibly apply to me. You see, when I went off the Paleo Diet I did so because I wanted to add things like muffins and cookies back into my diet. There are plenty of gluten-free recipes that rely heavily on rice-flour, an easy to find and fairly affordable ingredient. So while I was able to make and eat plenty of muffins and cookies without getting hives, I did have celiac-like reactions to my beloved baked goods. For a couple of weeks, I made 6 rice-based muffins on Sunday so that I would have breakfast for each day of the week. Each day I had a muffin for breakfast, I would get worse and worse. By Thursday, I really couldn’t sit at my desk for very long. After receiving the newest issue of Simply Gluten Free Magazine, which contained an article about Gluten Cross-Reactivity, I had to acknowledge something I had been unwilling to admit: I was reacting to the rice.

There were a few reasons why I didn’t admit this to myself. First, Gluten-Cross Reactivity seems to be a Celiac’s Disease-related syndrome. I have not yet been diagnosed with Celiac’s (because my gastroenterologist can’t see me for 3 months, she’s so busy!), and I suppose I felt it was unlikely that I would actually be diagnosed with a full-blown auto-immune disorder. Second, I just didn’t really want to admit it to myself. I was tired of running my whole life around what I couldn’t eat. My mentality was something like “at the least, I deserve to keep rice. I mean come on, it’s rice. I’m not asking for much, body. Just let me keep rice.” But, my unsympathetic body was unwilling to heed my requests. So, gone is the rice, along with all other grains, dairy, and probably simple sugars. That, and it’s looking more and more like I have full blown Celiac’s Disease. Which is ok, especially since I was able to figure out without years and years and years of suffering. Just 2 years. In relative terms, that’s really not too bad.

Good Luck to Everyone who also struggles with food allergies and temperamental immune symptoms. I hope this blog is a great resource for you or your friends. You’re welcome to message with any questions or comments 🙂

Article: Gluten Cross Reactivity

Hello Earthlings,

Today, while reading through an issue of Gluten Free Living, I came upon a brief article on something called Gluten-Cross reactivity. Intrigued, I did a little digging and found a more in-depth explanation of what “cross-reactivity” means. Here’s the article I found:

http://www.thepaleomom.com/2013/03/gluten-cross-reactivity-update-how-your-body-can-still-think-youre-eating-gluten-even-after-giving-it-up.html

Written by a Ph.D.-turned-gluten-free advocate, the article gives an in-depth look at the science behind gluten cross-reactivity. To be honest, at 1 A.M., the thoroughness of the article overwhelmed me, so I thought I’d try to simplify it for my readers. In short, if you have an auto-immune variety of gluten-intolerance (i.e. Celiac’s Disease), your body develops identify-and-attack cells called antibodies that are always on patrol for gluten. Once an antibody stumbles upon a gluten-protein, it sounds the alarm for all antibodies to converge on the spot and eliminate the invader. In people with Celiac’s, the attack-of-the-antibody brigade becomes over-zealous, and damage to the intestines results.

Why does this matter? Well, if you’re sick enough, your antibodies’ structure could become generalized enough to attack not just gluten-proteins, but any proteins similar to gluten as well. This is called Cross Reactivity, or the immune response that occurs when anti-bodies developed to attack gluten-proteins become generalized enough that they begin attacking proteins found in other foods as well. So, it’s possible that you could entirely eliminate the gluten-protein from your diet and still continue to have glutenated symptoms when you eat foods with similarly structured proteins.

My reaction to this was “Oh my goodness, seriously? I mean really? Come on world, cut me some slack.” As you might have guessed, if you suspect you’re experiencing cross-reactive symptoms, you’ll need to cut all of those foods out of your diet as well. Here’s a list of cross reactive foods (this list is taken from the link above):

Oats (2 different cultivars)
Buckwheat
Sorghum
Millet
Amaranth
Quinoa
Corn
Rice
Potato
Hemp
Teff
Soy
Milk (Alpha-Casein, Beta-Casein, Casomorphin, Butyrophilin, Whey Protein and whole milk)
Chocolate
Yeast
Coffee (instant, latte, espresso, imported)
Sesame
Tapioca (a.k.a. cassava or yucca)
Eggs

There is some good news! Most of these only need to be eliminated temporarily. However, the bad news is that corn, potato, milk, yeast, and rice are the ones that need to be eliminated permanently. Over time, your antibodies become less aggressive, and you can likely re-introduce all but the five aforementioned ingredients. Some more good news? Only 20% of Celiac’s suffer from cross-reactivity according to a small number of studies, so this likely doesn’t affect the vast majority of Celiacs.

I can’t say I exactly understand the specifics behind how this applies to Non-Celiacs-Gluten-Intolerant sufferers. I haven’t been diagnosed either way yet (have to wait 3 months to see my gastroenterologist..). I do know that I react to corn, potato, and milk. Milk provokes gluten-like symptoms, while corn and potato bring on hives along with some gastro-intestinal upset. Gluten-Intolerants are classified separately because it is believed that they do not experience an auto-immune reaction (as Celiacs do). However, their condition is also not considered a mere allergy. It’s sort of a confusing distinction for me (perhaps I’ll do some research to better define how these labels are distinguished from one another).

I hope this article is helpful for those who still experience symptoms despite going gluten-free. Good Luck!

Recipe: Jerusalem Turkey Burgers

IMG_8871

When I started learning to cook for my new gluten-free lifestyle, Jerusalem by Yotam Ottolenghi and Sami Tamimi was one of the first cookbooks to catch my eye. The book itself is beautifully crafted, rife with colorful photographs, and filled with unique stories of life in Jerusalem. Simply as a book, it sheds light on a culture always on the periphery of the American Mind.

When you start cooking the recipes in the book, however, the streets of the city come alive in your kitchen as the spices z’atar, sumac, and cumin charge the air with their unique aromas. Written for the dilettante chef interested in Israeli food, the recipes utilize authentic ingredients but remain simple enough for even the most novice of home cooks. Today, I made the Turkey Burger Recipe found on page 200. Without the sour cream based sauce, the turkey burger patties are completely gluten-free and paleo! With the sauce, they’re just all the more delicious. They only took me about 30 minutes to make from scratch (although they did create quite a few dishes to clean). Each burger’s varied flavors kept every bite interesting, and it took willpower for me to set just 3 of the 12 total aside for tomorrow’s work-day lunch!

Turkey & Zucchini Burgers with green onion & cumin, from Jerusalem

Ingredients:

For the patties:
1lb ground turkey
1 large zucchini, coarsely grated
3 green onions, thinly sliced
1 large egg
2 tbsp chopped mint
2 tbsp chopped cilantro
2 cloves garlic, crushed
1 tsp ground cumin
1 tsp salt
1/2 tsp ground black pepper
1/2 tsp cayenne pepper (ommitted when I made them. Cayenne is a nightshade).
olive oil for pan searing

For the sauce (optional. Do not include if you’d like to eat Paleo):
1/2 cup sour cream
2/3 cup greek yogurt
1 tsp grated lemon zest
1 tbsp freshly squeezed lemon juice
1 garlic clove, crushed
1.5 tbsp olive oil
1 tbsp sumac
1/2 tsp salt
1/4 tsp black pepper

Instructions:
First, make the sour cream sauce by placing all the ingredients in a small bowl. Stir well and set aside or chill until needed.

Preheat the oven to 425 degrees. In a large bowl, combine all the ingredients for the meatballs except the oil. Mix with your hands and then shape into about 18 burgers (I made 12).

Pour the oil into a large frying pan to form a layer about 1/8 inch thick. Heat the oil over medium heat until hot, and sear the meatballs in batches on all sides. Cook for about 4 minutes on each side until golden brown.

Transfer the seared meatballs to a baking sheet lined with wax paper (I just sprayed it with olive oil. Ran out of wax paper last week!). Place in the over for 5-7 minutes. Serve warm, with sauce if desired.

IMG_8868

IMG_8859

Product Review: Namaste Gluten Free Mixes

As my list of allergens becomes longer and longer, visits to the grocery store turn into desperate scavenger hunts for convenient products free of vinegar, nightshades, corn, and gluten. So when  I do happen upon a product (any product) that meets these four requirements, I generally snatch it up regardless of whether or not I actually need it at the moment. That’s how I came to have two bags of Nameste Gluten Free Baking Mixes, one Muffin Mix and one Biscuit/Pie Crust mix, sitting in my pantry. They sat there, neglected, until I had the opportunity to test my reactions to brown rice. Little did I know that hiding within those plain brown bags were the tools to make delicious gluten free baked goods without the pain of measuring flours!

I have made an apple pie crust, blueberry muffins, and chocolate chip muffins with these mixes, and all have turned out fabulously. I’d have a difficult time distinguishing that pie crust from a wheat-based pie crust if blindfolded (aside from the fact that it was ever so slightly crumbly I suppose). The muffins held together very nicely, even when the bread structure was impeded by my comically large frozen blueberries. What I really love about these ready-made mixes is their inclusion of xanthan gum over guar gum. Guar gum, like xanthan gum, is helpful in holding together gluten-free baked goods, and it’s about 1/5 of the price of xanthan gum. Accordingly, many companies opt for Guar Gum over Xanthan Gum because it dramatically cuts down on production costs. However, Guar gum is derived from legumes, making it difficult to digest and giving it laxative properties. Xanthan Gum, on the other hand, is a milk-based derivative of whey powder. I find Xanthan Gum is much easier for me to handle.

To be honest, I feel like Namaste Mixes is reading my blog and making these products exclusively for me. Every single mix is produced in a facility free of potatoes, corn, vinegar, gluten, casein, and a handful of other Not Top 8 common allergens. And to top it all off, all three of my attempts at baking with these mixes has proven to be excellent! (I follow the provided recipes on the packaging. I have not tested this theory with non-Namaste recipes). I can’t recommend them enough to gluten-free eaters, especially those with multiple food allergies, and people who care for or entertain them (never worry again about inviting gluten-free eaters over for brunch!).

PS: I buy these at Whole Foods, and I have found them at Fresh Market. Most health foods stores should have them :]

Price: Depends on which mix you get, but they seem to come in at $4 for a bag that will make one batch of muffins. Much less expensive than Whole Food’s frozen gluten-free muffins ($9), which are full of corn syrup and potato starch!

Taste: 5/5 Delicious!

Texture: 5/5. I honestly find the ability of these mixtures to replicate an above-par texture without relying on a ton of allergen-additives amazing.

. 

Product Review: Paleo Hail Merry Tarts and Macaroons (Not the French Kind)

mixed6tarts3_1

After searching far and wide for a store-bought, easy to eat Paleo dessert, I could only find two products. Thankfully, they’re both DELICIOUS! These “Miracle Tarts” by Hail Merry are a life saver when you’ve got a hankering for something sweet. At about $5 a pop, they’re probably not going to become an every day snack item, but will definitely leave you feeling satisfied. It’s actually hard to know that they’re Paleo desserts (perhaps the tart crust is the only thing that barely gives it away). The “custard” in the center is creamy and delicious no matter what flavor you try (the chocolate tart is astonishingly good), and the variety of flavors is wonderful. I’ve even brought these into restaurants with me so my dining companions can order their glutenated desserts without feeling guilty while I chow down! I buy these at Whole Foods, but the company does offer online ordering for anyone who doesn’t have local access. I promise, if you check one of these out, you won’t be disappointed!

Taste: 5/5

Price: $5 (for the quality and convenience, I’d happily pay this)

Texture: 4/5 (All around delicious, and the cream gets a 5/5. The ‘crust’ is a bit too crumbly, which is what earns this tart a 4/5. However, the crust is also absolutely delicious!)

Recipe: Paleo Pecan Crusted Baked Salmon

IMG_8647

Hello Readers! Sorry for the gap in posting, I’ve been preoccupied with learning a new programming language :] That, and I got a little tired of cooking elaborate meals every night. So, I took a break and subsisted on plain baked chicken and broccoli. I do have some very exciting news for you! In the past 10 days, I’ve been able to successfully add milk, chocolate, and coffee back into my diet! Needless to say my sweet tooth is very grateful. I’ve also been able to definitively identify potatoes as a major instigator of my hives and vinegar (seemingly all types) as a second culprit. So it has been an eventful few weeks for me! I did start keeping a food journal (which helped me pinpoint vinegar as a problem), and I’ve actually found it to be a somewhat enjoyable hobby to track my food intake. I guess that shows you how exciting of a person I am 😉

Anyway, I’ve got lots of recipes to post! The picture above is of Pecan Crusted Baked Chicken with a vinegar-less honey-mustard seasoning. It came out very sweet (due to the lack of vinegar), and still requires some tweaking. I ended up trying to add a ton of salt to make up for the lack of vinegar, but the dish was still overpowered by the sweetness of the honey. It was, never-the-less, delicious, although pallets without a proclivity for sweets might not enjoy it as much. Rather than posting the recipe for this one, I think I’ll try to remake it with better results. Look forward to the update! 😀