Recipe: Paleo Bacon Burgers

IMG_9016

One of my favorite questions that people ask when they learn about my diet restrictions goes something like “My goodness…what CAN you eat?” Well, as regular readers probably know, you can eat just about anything (you just need to work a bit harder for it). The picture above should be evidence of that!

This weekend I was traveling, and despite my best efforts I did go hungry a couple of times. So I wanted to make tonight’s dinner a feast of fantastic proportions to counteract my lean weekend. I rediscovered some Applegate Turkey Burgers in the freezer and decided that tonight would be burger night. After a pitstop to whole foods to pick up some nitrate-free organic Applegate bacon, I set to work. Making turkey burgers is no easy feat when you need to make pretty much everything from scratch (the only thing that I had pre-prepared was the frozen patties). I had to make the ‘buns’ (which are just pancakes) and the onion rings from scratch. I’ve provided the recipe for the onion rings below (the pancakes can be found here. Incidentally, I replaced the eggs in the pancake recipe with egg whites. The pancakes were lumpier, but much lower in cholesterol and still tasty). As for the fillings, get creative! Add whatever you’d like!

Gluten-Free, Paleo Onion Rings (you know, except for the fact that cavemen probably weren’t frying things):

1/4 cup Almond Flour
2 tbsp cocolunt flour, sifted
1/4 cup arrowroot starch
1/2 tsp granulated garlic
1/8 tsp turmeric
2 eggs (substituting egg whites doesn’t work very well)
1/2 cup coconut milk (I used water because I didn’t have coconut milk. You may need a little more)
Frying oil
2 onions, sliced into thin rings

Instructions:

Place the flours, arrowroot, and spices in a medium bowl, whisk to combine. Add the eggs and coconut milk (or water). Whisk until smooth. If the batter is too thick, add additional coconut milk for desired consistency.

In a large non-stick skillet, heat enough oil to come half way up the sides of the onion slices to 330 degrees. Coat onion slices into batter, shake of excess batter, and place into hot oil. Cook each side for 2 minutes, then remove with tongs an set on a paper towel to remove excess oil. Enjoy!

Recipe: Paleo Burritos

IMG_9005

So, the world keeps knocking me down as far as baked goods go. By retreating back to the Paleo diet and avoiding all grains completely, I am now limited to almond flour and coconut flour in terms of baking tools. While I’ve seen some pretty creative recipes for solving the tortilla dilemma (one of which involved food processing cauliflower, adding egg, and baking that in a tortilla shape), all of them posed an intrusive flavor. And then, my boyfriend mentioned to me that Jimmy John’s (the sandwich company) offers a bread-free sandwich called an ‘Unwich.’ Basically, they wrap your sandwich ingredients in lettuce! While Jimmy Johns would likely continue to be unsafe for a celiac, the idea is genius! So I tried to apply it to an old standby: tacos and burritos. And I must say, it works beautifully! Depending on which type of lettuce leaf you use, you can lump all of your taco ingredients into a good sized leave, fold it just like you would a tortilla, bite into a crunchy outer ‘shell,’ and enjoy!

Here’s my basic burrito recipe (free of nightshades, which still cause headaches and hives in my case). It is grain-free and legume-free (as are all Paleo Dishes), but I couldn’t resist adding cheese in. I seem to tolerate it pretty well, so what the heck?

Ingredients (to make 3 burritos):
For Meat:
1lb chicken breast (cubed) or 1lb ground beef
Cilantro
1/2 tsp Salt and Pepper
1 tsp Cumin
1 tsp Garlic Powder
1 tsp Onion Powder

For Guacamole:
1 avocado
1/2 clove garlic, chopped
1/4 yellow onion, diced
1 lime
Salt and Pepper
1/4 tsp Cumin

1 slice American Cheddar Cheese, cut into strips (this is what I had on hand!)
Lettuce (Kale and Romaine both work nicely, but you could probably use anything you have lying around 🙂 ).

Instructions:

Make the Guacamole first. Gut the avocado until you’re left with only the green meat, and place in bowl. Add the juice from 1/2 a lime, the chopped garlic, and the diced onion, and mash together (works best with 2 spoons). Once mashed, add salt and pepper to taste. Cover and refrigerate until ready to add to burrito. (Note: traditional guacamole recipes call for jalapeno peppers and tomatoes. Feel free to add these if you don’t have a nightshade intolerance).

For chicken, you’ll need to slice the chicken into small chunks and season the small chunks while they rest on a plate. For ground beef, you’ll need to place the 1 lb chunk of ground beef in a mixing bowl, season, and then mix the meat with your hands. Add all seasonings to meat, and then transfer meat to a hot, greased skillet (over medium heat). Cook until done, and set aside.

Cut your slice of cheddar cheese (Aged white is my preference!), into strips. Serve everything on a large plate, and allow the person eating to assemble their burritos.

To assemble, use a spoon to place two dabs of guacamole onto the center of a lettuce leaf. Use the back of the spoon to spread the guacamole evenly. Add your meat directly on top of the guac, and cover with cheese strips. Wrap, and enjoy! I know they’re simply, but they’re positively delicious.

A final thought, if you use Kale, you might be looking at a $5-foot-long burrito 🙂 (pictured below)

IMG_9009

Recipe: Paleo Pancakes!

IMG_9004

I’m not sure if you, readers, have noticed this or not, but I’m just a tiny bit stubborn. When forced with having to give up all of my favorite, glutenated foods, I more or less just say “Nope, I’ll find a way around it.” As you might imagine, these workarounds don’t always turn out wonderfully (especially when they’re of my own making!). I’m happy to say that these pancakes do not fall in that category. They are absolutely delicious when topped with maple syrup (or any other topping, I would imagine).

This recipe comes from a FANTASTIC book called Paleo Indulgences. Oddly enough, they’re actually part of a recipe for a Bacon Burger! The pancakes serve as the bun for the burger in that recipe. I have a couple left over, and I’m planning to use them as bread for a Paleo frozen breakfast sandwich trial (stay tuned!). Anyway, I’ve made a few things from this book now, and these pancakes are my favorite thusfar. They taste delicious, and, like most baked Paleo goods, have a pleasant flavor of coconut to them (trust me, I never liked coconut until I was forced to, and these were good). They’re fairly easy to make, and much more filling than normal pancakes. Good luck, and enjoy!

Maple Pancakes (or, Maple Pancake Buns!)

Ingredients:

Dry
1/3 cup (30g) almond flour
3 tbsp coconut flour, sifted (you really must sift coconut flour, or it will be too clumpy)
Salt (a pinch)
1/2 tsp baking powder

Wet
4 eggs
1/2 tsp pure vanilla extract
2 tbsp pure maple syrup
2 tbsp coconut oil, melted

Instructions:

Heat a griddle or skillet to 350 degrees (low-medium). Place the dry ingredients in a bowl and whisk. Combine all wet ingredients except coconut oil in a separate bowl, whisk to combine. Add the wet ingredients (not the coconut oil) to the dry ingredients, and combine lightly. Once the contents of the two bowls are mixed, add the coconut oil and mix well (you’ll need to aggressively whisk to get the clumps out of the almond/coconut flour). Grease the skillet with either more coconut oil or olive oil spray, and spoon batter onto the skillet/griddle in 3-4″ circles. Allow to cook until the top of the circles bubble and the edges begin to curl upward, then flip. Cook for 2 more minutes (until both sides are browned), serve and enjoy! This recipe made 5 small pancakes, and can easily be doubled.

Recipe: Jerusalem Turkey Burgers

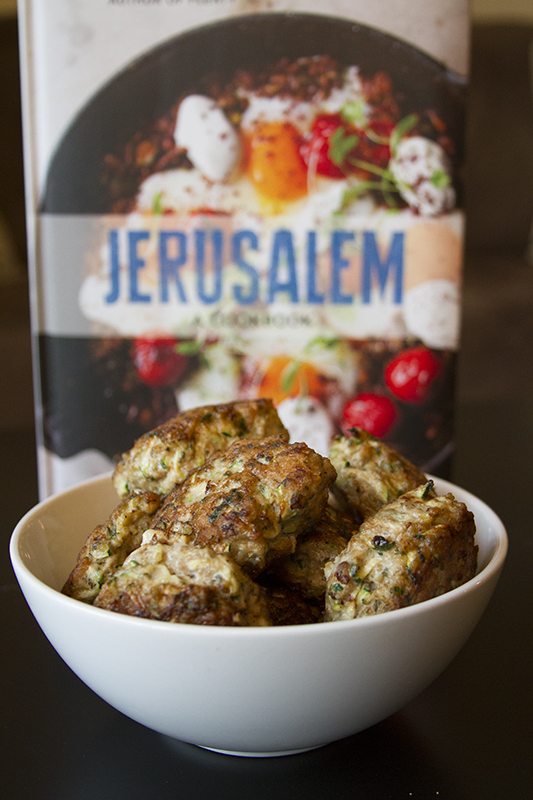
IMG_8871

When I started learning to cook for my new gluten-free lifestyle, Jerusalem by Yotam Ottolenghi and Sami Tamimi was one of the first cookbooks to catch my eye. The book itself is beautifully crafted, rife with colorful photographs, and filled with unique stories of life in Jerusalem. Simply as a book, it sheds light on a culture always on the periphery of the American Mind.

When you start cooking the recipes in the book, however, the streets of the city come alive in your kitchen as the spices z’atar, sumac, and cumin charge the air with their unique aromas. Written for the dilettante chef interested in Israeli food, the recipes utilize authentic ingredients but remain simple enough for even the most novice of home cooks. Today, I made the Turkey Burger Recipe found on page 200. Without the sour cream based sauce, the turkey burger patties are completely gluten-free and paleo! With the sauce, they’re just all the more delicious. They only took me about 30 minutes to make from scratch (although they did create quite a few dishes to clean). Each burger’s varied flavors kept every bite interesting, and it took willpower for me to set just 3 of the 12 total aside for tomorrow’s work-day lunch!

Turkey & Zucchini Burgers with green onion & cumin, from Jerusalem

Ingredients:

For the patties:
1lb ground turkey
1 large zucchini, coarsely grated
3 green onions, thinly sliced
1 large egg
2 tbsp chopped mint
2 tbsp chopped cilantro
2 cloves garlic, crushed
1 tsp ground cumin
1 tsp salt
1/2 tsp ground black pepper
1/2 tsp cayenne pepper (ommitted when I made them. Cayenne is a nightshade).
olive oil for pan searing

For the sauce (optional. Do not include if you’d like to eat Paleo):
1/2 cup sour cream
2/3 cup greek yogurt
1 tsp grated lemon zest
1 tbsp freshly squeezed lemon juice
1 garlic clove, crushed
1.5 tbsp olive oil
1 tbsp sumac
1/2 tsp salt
1/4 tsp black pepper

Instructions:
First, make the sour cream sauce by placing all the ingredients in a small bowl. Stir well and set aside or chill until needed.

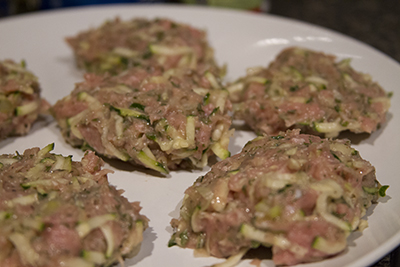
Preheat the oven to 425 degrees. In a large bowl, combine all the ingredients for the meatballs except the oil. Mix with your hands and then shape into about 18 burgers (I made 12).

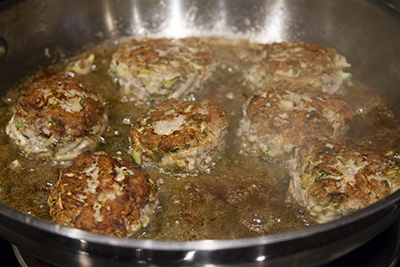
Pour the oil into a large frying pan to form a layer about 1/8 inch thick. Heat the oil over medium heat until hot, and sear the meatballs in batches on all sides. Cook for about 4 minutes on each side until golden brown.

Transfer the seared meatballs to a baking sheet lined with wax paper (I just sprayed it with olive oil. Ran out of wax paper last week!). Place in the over for 5-7 minutes. Serve warm, with sauce if desired.

IMG_8868

IMG_8859

Recipe: Paleo Orange Chicken

IMG_8530

One of the first things that I made for myself when I went gluten free was orange chicken. Now that I’m forced to restrict my diet even further, I needed to re-imagine one of my favorite dishes in the spirit of my great great great great great great ^ 20th grandparents (ie: the cavepeople, to be politically correct). And I have to say, it came out surprisingly well. I don’t think I’ll use coconut oil for sauteing the chicken and moistening the Cauli-Rice (‘rice’ made from cauliflower) again, because the coconut flavor that penetrated the entire dish was a little distracting. Unfortunately, coconut oil/mana/aminos/flour are staples of the Paleo diet, so my life long aversion to the flavor simply has to go. Aside from being unable to fry the chicken (since I wasn’t able to coat it in anything), I thought the dish came out pretty well. The Cauli-Rice was surprisingly delicious, with a pretty memorable omage to your local hibachi place’s fried rice. The chicken achieved an interesting crunchyness when fried in the coconut oil. I would add a bit more garlic in next time. I had intended to use a garlic paste that’s in my refrigerator, but, as a relic of my less healthful days, it was chock full of ingredients that are strictly prohibited on my new diet. Anyway, enjoy!

Paleo Orange Chicken

Ingredients:

For Chicken:

2 Oranges, Juiced

Zest of 1 Orange

2 Chicken Breasts (using dark me would be more reminiscent of real orange chicken, but I used breast since it’s what I had)

2 Cloves Garlic, Minced

Chilli Powder (Optional)

3 Tbsp Coconut Aminos (soy sauce replacement)

3 Green Onions, Chopped

1 Tsp Ginger, Minced

For Cauli-Rice:

1 head of Cauliflower, chopped or processed in a food processor to be the size of rice grains (two pulses per floret in my magic bullet!)

Half a White Onion, Chopped

Salt and Pepper to taste

Garlic Powder

Instructions for Chicken: In a medium size sauce pot, add the orange juice, zest, ginger, coconut aminos and chili garlic sauce or sriracha. Set over medium heat and let simmer to reduce and thicken while the chicken cooks. In a saute pan, heat 3 T of the fat of your choice, over medium high heat. Add the chopped chicken thighs and cook until a nice brown crust has developed on the chicken pieces, about 6 minutes. Add the chicken to the sauce pot and stir to coat with the orange sauce. Serve topped with sliced green onions.

Instructions for Rice: Place a small sauce pan over medium heat, melt 2 Tbsp of coconut oil. Add onions and cook until clear. After onions are finished cooking, add Cauli-rice. Season with salt, pepper, and garlic powder. Serve with chicken. (I think the rice tastes better with a little browning in parts, so don’t be afraid to increase the heat a bit).

Enjoy!

Recipe: Paleo Date Ball Dessert

IMG_8524

As I mentioned in my previous post, it’s quite a challenge to incorporate sweets into my diet these days (especially easily acquired sweets!). This is probably a good thing, but it didn’t stop me from figuring out a loop hole! I really will be a great lawyer, won’t I? These sweet treats (which my non-Paleo boyfriend also enjoyed quite a bit) are a great way to satisfy that sugar craving while staying on track. Note: you will need a blender/magic bullet/food processor for this one.

Goodness Gracious Date Balls of Fire! *credit to Ruben

Ingredients:

5 Dates, pits removed

1/4 tsp Cinnamon

Walnuts, chopped (the ones I used were seasoned in Cinnamon and Misquite Pod. Mmm.)

1/4 tsp Vanilla

Instructions:

Chop the walnuts in the processor before adding anything else, then remove. Then, combine all ingredients in food processor, blend until smooth-ish. Role in to balls, and enjoy! If you’d like, you can coat them in the walnut powder that is likely left behind (pictured above). Feel free to experiment with different ingredients!

Recipe: Paleo Mahi Mahi with Mango Avocado Salsa

IMG_8522

Finding ways to satisfy my powerful sweet tooth is one of the main challenges of my hyper-restrictive diet. So when the idea to create Mango Salsa hit me out of the blue in the middle of work (at 11am, no less), I spent the whole day dreaming of my future creation. It turned out to be every bit as delicious as I had hoped! This dish is very rich in healthy fats and oils, including Omega-3 (Mahi), Omega-6 (Avocado), and Folate! It definitely hit the spot after a week straight of eating salt-and-pepper chicken (bleh!). I’ve also recently purchased an indoor electric grill designed specifically for apartment dwellers. It’s been a wonderful addition to my cooking tools, and I’d highly recommend one to anyone who is also bound by lease rules! (I’ve linked the model that I bought, which I’m very happy with, below).

For Salsa:

1 Mango, Diced (you could peel it, but It didn’t make much of a difference to me. Besides, there are tons of nutrients in fruit skins!)

1.5 Avocado, Peeled and Diced (I had small ones, hence the .5)

Juice from 1 Lime

Fresh Cilantro (I had to used dried, because the store was out. But use fresh, the flavor is much more potent).

Minced Garlic

Salt to Taste

Instructions: Combine all Ingredients (easy enough!)

For Mahi Mahi:

2 6oz portions of Mahi Mahi

Cilantro Leaves

Garlic

Salt and Pepper

Instructions: Season fish with ingredients as desired (I’d recommend emphasizing the Garlic most of all. It comes through nicely with the salsa). ‘Grill’ fish on 350 degree grill top for 5 minutes on each side. Fish is delicate, so be careful!

Indoor Grill: http://www.amazon.com/Calphalon-Kitchen-Electrics-Removable-Plate/dp/B008P47F6K/ref=pd_sim_sbs_k_2 (I know the Cuisinart version of this has many more reviews, but upon examining them side by side, this one seems to have a far superior build. Plus the feature that allows you to open the grill entirely up and have 2 cooking surfaces puts this one over the top.)

IMG_8521

Paleo Recipe: Butternut Squash Hash

IMG_8514

Hello Readers! First, I wanted to share with all of you that I’m feeling absolutely wonderful. I’m hive free, I’m optimistic, and things are looking up! As you know, There has been a two week gap in my posting following a hives relapse. You can read more about this at the bottom of the “Bucking the Trend” page! My recipes for a short while will be Paleo + Nightshade free. Lets start off with a new one: Butternut Squash Hash!

First, let me make one thing clear: I LOVE potatoes. I mean, they kept the Irish alive for centuries! I love them in a box, with a fox, in a tree, but most of all, drenched in sour cream and chives. Alas, out of fear that nightshades might be contributing to my hives, I’ve cut them out of my diet for the time being. So, I created an alternative using butternut squash! This recipe tastes a lot like a Sweet Potato hash (think the cubed potatoes you’d have served to you at Perkins or IHOP), and is easy and delicious. The most difficult part is cubing the butternut squash, which takes me nearly half an hour to do (if I’m cutting up a whole one). One half of a squash makes enough for 2 people, and you can halve everything in the recipe if you need to.

Butternut Squash Hash:

Ingredients:

1 Butternut Squash, peeled, cubed (I recommend warming the squash in the microwave for 1.5 to two minutes to make it easier to work with. Cutting it is dangerous! I cut through my thumbnail :/ )

1/2 White Onion, diced

Salt and Pepper

Olive Oil

Instructions:

Pretty much just Saute everything in a skillet with olive oil! I’d recommend caramelizing the onions in the skill for a bit before adding the squash, as this seems to impart a stronger onion flavor. Add the butternut squash (carefully, don’t splatter the hot oil on yourself. It burns your skin. I may or may not know this from experience…), and cook until it’s soft enough for you to split in half with a plastic spatchula. If you over cook the squash, it turns out a bit too mushy for my taste.