Oatmeal Raisin Cookies

WP_20141224_01_56_09_Pro

It seems to take about a dozen attempts to correctly convert a conventional recipe to a gluten free recipe. It’s a tough job to eat batch after batch of gluten free cookies, but someone has to do it!

I have finally perfected a GF oatmeal cookie recipe. Enjoy!

Ingredients:
1/2 cup shortening
3/4 cups light brown sugar
1/4 cup granulated sugar
2 eggs
1 tsp vanilla (for pete’s sake don’t buy mckormick…switching made a huge difference).
1 cup certified gluten free oats
2 cups oat flour
A little less than 1 tsp baking soda
1 tsp arrowroot starch (tapioca starch works, but not as well)
Between 1/2 and 1 tsp salt
1 cup raisins (and whatever else you’d like to add)

Instructions: Preheat oven to 350 degrees. Prepare 2 cookie pans (makes about 12 cookies).

1) Use a hand held electric mixer to mix the shortening, the light brown sugar, and the granulated sugar. Add in the vanilla and the eggs, and continue to mix until evenly mixed.
2) In a separate bowl, combine oat flour, baking soda, arrowroot starch, and salt.
3) Combine the dry ingredients and the wet ingredients. Beat with the mixer until well mixed.
4) Pour in the raisins and the oats, mix by hand.
5) Take table spoon sized heaps of dough, place them on the cookie sheets, and flatten them slightly (gluten free cookies don’t spread out as well as normal cookies).
6) Bake for 14-16 minutes. Remove from oven, allow to sit for at least 5 minutes. Then move to a plate to cool, but you should be able to sneak one while it’s still warm!

Recipe: Salted Caramel Ice Cream


IMG_8648

So, there are very few desserts that are naturally gluten-free. And even if you can replicate them in gluten-free form, you generally burn off all the calories you’re hoping to consume with the effort. I don’t know about you, but sometimes I’d just love something to indulge in that requires minimal effort. After raking my lazy brain for possible ways around having to bake elaborate gluten-free desserts for that late night quick-fix, I determined that ice cream would probably be the best choice for satisfying my lazy, gluten-free sweet tooth. However, as I scoured the shelved (even of Whole Foods) for gluten-free, nightshade-free, corn-free, and additive-free ice cream and ice cream alternatives, I came up empty time and again. The only place I was able to find ice cream that had no strange ingredients (like dextrose, maltodextrose, or guar gum), was Fresh Market, and all they had was Vanilla! So, I resolved to make my own ice cream out of sheer stubbornness. After confirming that milk did NOT give me hives (horray!) and receiving a generous gift of a $50 ice cream maker from my mom (who was thrilled to help me along the path to good health!), I searched for a recipe for one of my favorite ice-cream flavors: Salted Caramel.

Oh. My. Goodness. It was delicious.

If you remember to freeze the mixing bowl the night before, ice cream takes about 40 minutes to make total. First, you have to create a flavor syrup on the stove by melting ingredients and mixing them with some heavy cream. This process takes about 15 minutes and is kind of stressful, since you really need to act quickly to hit the sweet spot in terms of your syrup’s cooking time. Then, you add all remaining recipe ingredients to the syrup, and set it to cool in the fridge for about 2 hours (I set mine in the freezer for about 15 minutes at the end of that 2 hour period to assure extra coldification…<- totally a word). Once your mixture is very cold, you pour it into the ice cream machine, let it churn for 20 minutes, and then either eat it as a soft serve consistency or put it in the freezer to firm up (both are delicious). I thought it was pretty easy to do, and the results were freaking fantastic! I’ll list the recipe I found online, and I’ll be writing a review of an ice cream book that I use in the future (along with a review of must-have appliances for constant at-home cooking).

Enjoy!

Salted Caramel Ice Cream

Ingredients

  • 1 1/4 cups sugar, divided
  • 2 1/4 cups heavy cream, divided
  • 1/2 teaspoon flaky sea salt such as Maldon
  • 1/2 teaspoon pure vanilla extract
  • 1 cup whole milk
  • 3 large eggs
  • Equipment: an ice cream maker

Instructions

Heat 1 cup sugar in a dry 10-inch heavy skillet over medium heat, stirring with a fork to heat sugar evenly, until it starts to melt, then stop stirring and cook, swirling skillet occasionally so sugar melts evenly, until it is dark amber.

Add 1 1/4 cups cream (mixture will spatter) and cook, stirring, until all of caramel has dissolved. Transfer to a bowl and stir in sea salt and vanilla. Cool to room temperature.

Meanwhile, bring milk, remaining cup cream, and remaining 1/4 cup sugar just to a boil in a small heavy saucepan, stirring occasionally.

Lightly whisk eggs in a medium bowl, then add half of hot milk mixture in a slow stream, whisking constantly. Pour back into saucepan and cook over medium heat, stirring constantly with a wooden spoon, until custard coats back of spoon and registers 170°F on an instant-read thermometer (do not let boil). Pour custard through a fine-mesh sieve into a large bowl, then stir in cooled caramel.

Chill custard, stirring occasionally, until very cold, 3 to 6 hours. Freeze custard in ice cream maker (it will still be quite soft), then transfer to an airtight container and put in freezer to firm up.

Link to the original recipe:  http://www.epicurious.com/recipes/food/views/Salted-Caramel-Ice-Cream-354517#ixzz2Ujy4CTtM

Recipe: Paleo Date Ball Dessert

IMG_8524

As I mentioned in my previous post, it’s quite a challenge to incorporate sweets into my diet these days (especially easily acquired sweets!). This is probably a good thing, but it didn’t stop me from figuring out a loop hole! I really will be a great lawyer, won’t I? These sweet treats (which my non-Paleo boyfriend also enjoyed quite a bit) are a great way to satisfy that sugar craving while staying on track. Note: you will need a blender/magic bullet/food processor for this one.

Goodness Gracious Date Balls of Fire! *credit to Ruben

Ingredients:

5 Dates, pits removed

1/4 tsp Cinnamon

Walnuts, chopped (the ones I used were seasoned in Cinnamon and Misquite Pod. Mmm.)

1/4 tsp Vanilla

Instructions:

Chop the walnuts in the processor before adding anything else, then remove. Then, combine all ingredients in food processor, blend until smooth-ish. Role in to balls, and enjoy! If you’d like, you can coat them in the walnut powder that is likely left behind (pictured above). Feel free to experiment with different ingredients!

Recipe: Blueberry Muffins

photo

These gluten-free muffins were made from a recipe found in the Culinary Institute of America’s Gluten-Free Baking book. The recipe involves a pretty complex blending of flours (which I totally screwed up), so pay close attention during flour mixing! They turned out pretty well, although I wish I’d used frozen blueberries rather than freshish blueberrys (they were a little too tart for a muffin). I think I’ll try experimenting with some recipes that are a bit less complicated (flour wise) before coming back to this one.

Recipe Coming Soon (Too lazy to type it all out right now).

Recipe: Mochi

IMG_8466


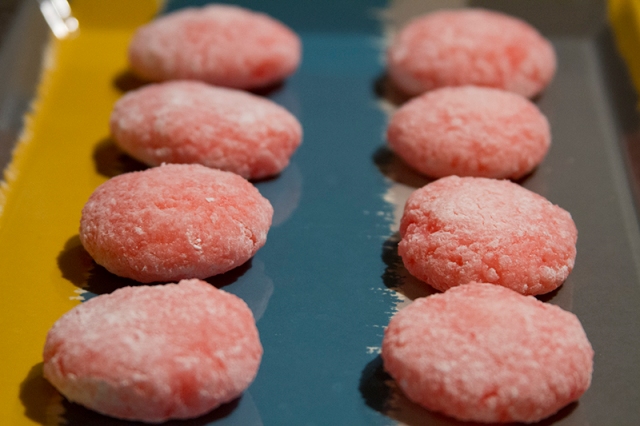
This alternative Japanese dessert/snack is naturally gluten free and a great choice if you’re looking for something refreshing (and devoid of all of the other food allergens!). My attempt came out a little more lumpy than is usual (because I tried to grind my own rice flour), but the taste was still great (and the texture was fine by me!). It takes about 20 minutes to make since you actually do most of the “cooking” in the microwave, so it’s an easy recipe to make. Enjoy!

Original Recipe: http://veganyumyum.com/2009/03/daifuku/

Daifuku
Makes 10-12 Filled Cakes

1 Cup Mochiko (Sushi Rice)
1/4 Cup Sugar
2/3 Cup Water
2-3 Drops red or green food coloring, optional
Cornstarch or Potato Starch, for dusting

Add the mochiko, sugar, water, and food coloring (if using) to a microwave safe bowl. Stir well, making sure there are no lumps. Scrape down the sides of the bowl as best you can with a rubber spatula, otherwise they’ll get all gross when the dough is microwaved.

Cover lightly with plastic wrap and mircowave for 2 minutes. Remove bowl from the microwave and stir VERY well. Dough will be much thicker, but there should still be some raw parts underneath. I like to use a sturdy silicone spatula to mix the dough at this point. Place the dough back in the microwave for 1 more minute.

Open the door and peek–did the dough start sinking as soon as the door opened? If so, the dough was inflating while cooking, which means it’s ready. If not, microwave for 1 more minute and check again. You shouldn’t have to microwave for more than 4 minutes total (2 minutes initial cooking, 2 more additional minutes after mixing).

One the dough deflates when you open the door, remove the dough from the microwave and scrape it out onto a cornstarch-coated cutting board.

Pat the hot dough (be careful! It’s hot!) with cornstarch and flatten it out a little. Cut into 10-12 even pieces. Roll pieces into small balls, using more cornstarch as needed to roll.

IMG_8463 IMG_8464

Recipe: Nutella Cookies (Perfect blend of Crunchy Edges and Chewy Centers!)

IMG_8461

And you thought people who switched to gluten-free diets lost weight.

Not if these cookies have anything to say about it!

Say goodbye to crunchy, crumbly gluten-free cookies! These turned out perfectly! With a just-crispy perimeter and a soft center, I’d say these cookies managed to reach the pinnacle of cookie texture. Taste-wise, they were a little too sweet for my taste (although still delicious). I think I’ll experiment with a salt complement the next time around (perhaps pieces of salted caramel?). Regardless, these were excellent and restored my waning faith in the potential of gluten-free cookies. Enjoy!

To make the flour:

Karina’s Basic Flour Mix (http://glutenfreegoddess.blogspot.com/2007/01/cooking-baking-gluten-free-tips-for.html)

1 cup Potato Starch

1 cup Sorghum Flour

1/2 cup Almond Flour

Nutella Cookie Recipe (Gluten-Free on a Shoestring: http://glutenfreeonashoestring.com/nutella-cookies/)

**A note about Gluten Free on a Shoestring: The recipes on this site always call for “High Quality All Purpose Gluten-Free Flour.” Well, the secret to wonderful gluten-free baked goods is choosing the right mix of flours, so calling for a generic flour mix can be problematic. Check out my guide to picking the right gluten-free flour mix under the Gluten Free 101: Baking Basics page when you get a chance (Unfinished at the time of posting). It will (eventually) give you the basic information you need to choose the perfect flour mix for cookie recipes, bread recipes, you name it!
By: Nicole @ Gluten-Free on a Shoestring.com
Recipe type: Cookies
Prep time:  5 mins
Cook time:  9 mins
Total time:  14 mins
Thin and chewy gluten-free cookies made with nutella and chocolate
Ingredients
  • 1 cup (140g) high-quality all-purpose gluten-free flour (Karina’s Flour Mix)
  • ½ teaspoon xanthan gum (omit if your blend already contains it)
  • ¼ teaspoon baking soda
  • ⅛ teaspoon kosher salt
  • ¼ cup (50g) granulated sugar
  • ½ cup (109g) packed light brown sugar
  • 2 tablespoons (28g) unsalted butter
  • 4 tablespoons (74g) Nutella hazelnut spread
  • 1 ounce semi-sweet chocolate, roughly chopped
  • 1 teaspoon pure vanilla extract
  • 1 extra-large egg at room temperature, lightly beaten
Instructions
  1. Preheat your oven to 325 degrees F. Line rimmed baking sheets with unbleached parchment paper and set them aside.
  2. In a large bowl, place the flour, xanthan gum, baking soda, salt, granulated sugar and brown sugar, and whisk to combine (working out any lumps in the brown sugar). Set the bowl aside.
  3. In a small saucepan over medium-low heat, heat the butter and Nutella until melted and smooth. Remove from the heat and add the chopped chocolate. Mix until the chocolate is melted and the mixture is smooth. Add the vanilla and stir to combine. Pour the Nutella-chocolate mixture into the bowl of dry ingredients, and mix to combine. Add the egg and mix until the cookie dough begins to come together. It will be wet but almost crumbly at first. Knead the dough until it is smooth.
  4. Pull off a piece of cookie dough that is about 1 inch in diameter (about 30g). Roll it tightly into a ball and then flatten it into a disk. Place the dough on the prepared baking sheets. Repeat with the remaining cookie dough, spacing the pieces of dough about 2 inches apart.
  5. Place the baking sheet in the center of the preheated oven and bake, rotating once during baking for 9 minutes or until the cookies have spread and have a cracked appearance on top.
  6. Remove the baking sheet from the oven and allow the cookies to cool until set before removing them from the baking sheet. When they first come out of the oven, the cookies are very fragile, but will firm up quickly.
  7. Freeze any leftover cookies.

IMG_8458