Sweet Potato Breakfast Hash

WP_20141223_17_18_18_Pro

We usually make eggs and bacon for breakfast if we have time (if not, it’s Glutenfreeda Instant Oatmeal for me). But I’m on winter break from law school at the moment, and I wanted to try making something different. This is the product!

Makes 2 Servings

Ingredients:
1 Ruby Sweet Potato
3 strips turkey bacon (we buy Applegate), cooked until fairly crispy
2 cups broccoli spears
1/4 sweet yellow onion, cut into approximate 1 inch pieces.
3 eggs to scramble
Garlic, salt, and pepper for seasoning

Instructions:
Place a skillet on medium-high (6/10) heat. With a sharp, large chef’s knife (preferably one with grooves to prevent a vacuum from forming) cube the sweet potato. If you can find your skinning tool, you can remove the skin from the potato. I couldn’t, so I didn’t! I’d recommend chunks somewhat smaller than the ones pictured here. 1/2 inch cubes would probably work. Place chunks in hot pan, cover with olive oil, and cover pan to allow chunks to cook evenly. These take the longest to cook, so you’ll want to start them first. While those chunks are cooking, Place strips of bacon into a separate skillet to cook. While both pans are cooking, cut the 1/4 onion pieces. Add them to the sweet potato pan, add enough oil so that there is some (but not much) visible at the bottom of the pan. Sprinkle with garlic, salt, and pepper (it’d probably be tastier if you used fresh garlic. I used powdered garlic, but now that I’m thinking of it I should have used fresh).

When the bacon is done, tear it into pieces with your fingers and add to the sweet potato skillet. In the now empty skillet where you were cooking the bacon, add broccoli. Add about a tablespoon of olive oil to cookie the broccoli. Once the broccoli is roasted (you can see parts of the spear beginning to brown), transfer to the sweet potato skillet.

By now the sweet potato skillet should be finished. After removing the sweet potato mix from heat and placing in serving bowls, I decided to cook scrambled eggs (not pictured here). I placed the eggs on top of the sweet potato mix, and served in a bowl. It was quite good!

Oatmeal Raisin Cookies

WP_20141224_01_56_09_Pro

It seems to take about a dozen attempts to correctly convert a conventional recipe to a gluten free recipe. It’s a tough job to eat batch after batch of gluten free cookies, but someone has to do it!

I have finally perfected a GF oatmeal cookie recipe. Enjoy!

Ingredients:
1/2 cup shortening
3/4 cups light brown sugar
1/4 cup granulated sugar
2 eggs
1 tsp vanilla (for pete’s sake don’t buy mckormick…switching made a huge difference).
1 cup certified gluten free oats
2 cups oat flour
A little less than 1 tsp baking soda
1 tsp arrowroot starch (tapioca starch works, but not as well)
Between 1/2 and 1 tsp salt
1 cup raisins (and whatever else you’d like to add)

Instructions: Preheat oven to 350 degrees. Prepare 2 cookie pans (makes about 12 cookies).

1) Use a hand held electric mixer to mix the shortening, the light brown sugar, and the granulated sugar. Add in the vanilla and the eggs, and continue to mix until evenly mixed.
2) In a separate bowl, combine oat flour, baking soda, arrowroot starch, and salt.
3) Combine the dry ingredients and the wet ingredients. Beat with the mixer until well mixed.
4) Pour in the raisins and the oats, mix by hand.
5) Take table spoon sized heaps of dough, place them on the cookie sheets, and flatten them slightly (gluten free cookies don’t spread out as well as normal cookies).
6) Bake for 14-16 minutes. Remove from oven, allow to sit for at least 5 minutes. Then move to a plate to cool, but you should be able to sneak one while it’s still warm!

Recipe: Paleo Bacon Burgers

IMG_9016

One of my favorite questions that people ask when they learn about my diet restrictions goes something like “My goodness…what CAN you eat?” Well, as regular readers probably know, you can eat just about anything (you just need to work a bit harder for it). The picture above should be evidence of that!

This weekend I was traveling, and despite my best efforts I did go hungry a couple of times. So I wanted to make tonight’s dinner a feast of fantastic proportions to counteract my lean weekend. I rediscovered some Applegate Turkey Burgers in the freezer and decided that tonight would be burger night. After a pitstop to whole foods to pick up some nitrate-free organic Applegate bacon, I set to work. Making turkey burgers is no easy feat when you need to make pretty much everything from scratch (the only thing that I had pre-prepared was the frozen patties). I had to make the ‘buns’ (which are just pancakes) and the onion rings from scratch. I’ve provided the recipe for the onion rings below (the pancakes can be found here. Incidentally, I replaced the eggs in the pancake recipe with egg whites. The pancakes were lumpier, but much lower in cholesterol and still tasty). As for the fillings, get creative! Add whatever you’d like!

Gluten-Free, Paleo Onion Rings (you know, except for the fact that cavemen probably weren’t frying things):

1/4 cup Almond Flour
2 tbsp cocolunt flour, sifted
1/4 cup arrowroot starch
1/2 tsp granulated garlic
1/8 tsp turmeric
2 eggs (substituting egg whites doesn’t work very well)
1/2 cup coconut milk (I used water because I didn’t have coconut milk. You may need a little more)
Frying oil
2 onions, sliced into thin rings

Instructions:

Place the flours, arrowroot, and spices in a medium bowl, whisk to combine. Add the eggs and coconut milk (or water). Whisk until smooth. If the batter is too thick, add additional coconut milk for desired consistency.

In a large non-stick skillet, heat enough oil to come half way up the sides of the onion slices to 330 degrees. Coat onion slices into batter, shake of excess batter, and place into hot oil. Cook each side for 2 minutes, then remove with tongs an set on a paper towel to remove excess oil. Enjoy!

Recipe: Paleo Burritos

IMG_9005

So, the world keeps knocking me down as far as baked goods go. By retreating back to the Paleo diet and avoiding all grains completely, I am now limited to almond flour and coconut flour in terms of baking tools. While I’ve seen some pretty creative recipes for solving the tortilla dilemma (one of which involved food processing cauliflower, adding egg, and baking that in a tortilla shape), all of them posed an intrusive flavor. And then, my boyfriend mentioned to me that Jimmy John’s (the sandwich company) offers a bread-free sandwich called an ‘Unwich.’ Basically, they wrap your sandwich ingredients in lettuce! While Jimmy Johns would likely continue to be unsafe for a celiac, the idea is genius! So I tried to apply it to an old standby: tacos and burritos. And I must say, it works beautifully! Depending on which type of lettuce leaf you use, you can lump all of your taco ingredients into a good sized leave, fold it just like you would a tortilla, bite into a crunchy outer ‘shell,’ and enjoy!

Here’s my basic burrito recipe (free of nightshades, which still cause headaches and hives in my case). It is grain-free and legume-free (as are all Paleo Dishes), but I couldn’t resist adding cheese in. I seem to tolerate it pretty well, so what the heck?

Ingredients (to make 3 burritos):
For Meat:
1lb chicken breast (cubed) or 1lb ground beef
Cilantro
1/2 tsp Salt and Pepper
1 tsp Cumin
1 tsp Garlic Powder
1 tsp Onion Powder

For Guacamole:
1 avocado
1/2 clove garlic, chopped
1/4 yellow onion, diced
1 lime
Salt and Pepper
1/4 tsp Cumin

1 slice American Cheddar Cheese, cut into strips (this is what I had on hand!)
Lettuce (Kale and Romaine both work nicely, but you could probably use anything you have lying around 🙂 ).

Instructions:

Make the Guacamole first. Gut the avocado until you’re left with only the green meat, and place in bowl. Add the juice from 1/2 a lime, the chopped garlic, and the diced onion, and mash together (works best with 2 spoons). Once mashed, add salt and pepper to taste. Cover and refrigerate until ready to add to burrito. (Note: traditional guacamole recipes call for jalapeno peppers and tomatoes. Feel free to add these if you don’t have a nightshade intolerance).

For chicken, you’ll need to slice the chicken into small chunks and season the small chunks while they rest on a plate. For ground beef, you’ll need to place the 1 lb chunk of ground beef in a mixing bowl, season, and then mix the meat with your hands. Add all seasonings to meat, and then transfer meat to a hot, greased skillet (over medium heat). Cook until done, and set aside.

Cut your slice of cheddar cheese (Aged white is my preference!), into strips. Serve everything on a large plate, and allow the person eating to assemble their burritos.

To assemble, use a spoon to place two dabs of guacamole onto the center of a lettuce leaf. Use the back of the spoon to spread the guacamole evenly. Add your meat directly on top of the guac, and cover with cheese strips. Wrap, and enjoy! I know they’re simply, but they’re positively delicious.

A final thought, if you use Kale, you might be looking at a $5-foot-long burrito 🙂 (pictured below)

IMG_9009

Recipe: Paleo Pancakes!

IMG_9004

I’m not sure if you, readers, have noticed this or not, but I’m just a tiny bit stubborn. When forced with having to give up all of my favorite, glutenated foods, I more or less just say “Nope, I’ll find a way around it.” As you might imagine, these workarounds don’t always turn out wonderfully (especially when they’re of my own making!). I’m happy to say that these pancakes do not fall in that category. They are absolutely delicious when topped with maple syrup (or any other topping, I would imagine).

This recipe comes from a FANTASTIC book called Paleo Indulgences. Oddly enough, they’re actually part of a recipe for a Bacon Burger! The pancakes serve as the bun for the burger in that recipe. I have a couple left over, and I’m planning to use them as bread for a Paleo frozen breakfast sandwich trial (stay tuned!). Anyway, I’ve made a few things from this book now, and these pancakes are my favorite thusfar. They taste delicious, and, like most baked Paleo goods, have a pleasant flavor of coconut to them (trust me, I never liked coconut until I was forced to, and these were good). They’re fairly easy to make, and much more filling than normal pancakes. Good luck, and enjoy!

Maple Pancakes (or, Maple Pancake Buns!)

Ingredients:

Dry
1/3 cup (30g) almond flour
3 tbsp coconut flour, sifted (you really must sift coconut flour, or it will be too clumpy)
Salt (a pinch)
1/2 tsp baking powder

Wet
4 eggs
1/2 tsp pure vanilla extract
2 tbsp pure maple syrup
2 tbsp coconut oil, melted

Instructions:

Heat a griddle or skillet to 350 degrees (low-medium). Place the dry ingredients in a bowl and whisk. Combine all wet ingredients except coconut oil in a separate bowl, whisk to combine. Add the wet ingredients (not the coconut oil) to the dry ingredients, and combine lightly. Once the contents of the two bowls are mixed, add the coconut oil and mix well (you’ll need to aggressively whisk to get the clumps out of the almond/coconut flour). Grease the skillet with either more coconut oil or olive oil spray, and spoon batter onto the skillet/griddle in 3-4″ circles. Allow to cook until the top of the circles bubble and the edges begin to curl upward, then flip. Cook for 2 more minutes (until both sides are browned), serve and enjoy! This recipe made 5 small pancakes, and can easily be doubled.

Recipe: 4th of July Chicken Fingers

IMG_8975
Hello Readers! So, on National Holidays, we as a nation gather to commemorate this or that major event over hot dogs, burgers, and some form of fried chicken. So today, on the Fourth of July, I really just wanted some chicken nuggets. You might think that a highly restricted, Paleo Diet might get in the way of that timeless cook-out dish, but it hasn’t! May I present to you my Paleo Chicken Nuggets, which are baked and lightly “breaded” with almond flour. Not only are the allergen- and Paleo-friendly, but they’re a healthier alternative to anyone who enjoys this time-honored treat.

Ingredients:
1lb Chicken Breast, cut into slices (for fingers) or cubes (for nuggets)
1 cup almond flour
2 eggs, lightly whisked
Salt and Pepper to taste
1/4 tsp Garlic
1/4 tsp Onion Powder
1/4 tsp Cumin
Any other spices you’d like to add! (you could add cayenne or paprika if you’re not nightshade-phobic, like me!).

Instructions:
Preheat oven to 400 degrees. Combine Flour and all spices in a bowl, mix well. Once you’ve cut the chicken into your desired shapes (you could even pound the breast and use cookie cutters to make fun Dino Nuggets!), dip each strip into the bowl of whisked egg. Once coated in egg, toss the chicken in a bowl filled with the almond flour and spices. Spray a cooking sheet lightly with olive oil, and place strips on the sheet. Place the sheet in the oven for 15 minutes. Once the 15 minutes are up, turn the broiler on your oven to Low, and broil the nuggets for 5 minutes. Turn over, and broil the other side for another 3-5 minutes. Let cool for 2 minutes, serve with your favorite sauce, and Enjoy! Happy Birthday America!

Recipe: Jerusalem Turkey Burgers

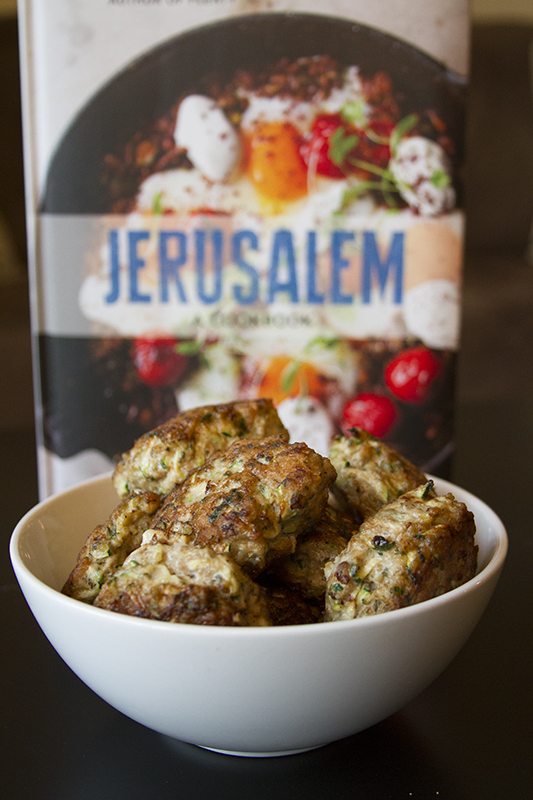
IMG_8871

When I started learning to cook for my new gluten-free lifestyle, Jerusalem by Yotam Ottolenghi and Sami Tamimi was one of the first cookbooks to catch my eye. The book itself is beautifully crafted, rife with colorful photographs, and filled with unique stories of life in Jerusalem. Simply as a book, it sheds light on a culture always on the periphery of the American Mind.

When you start cooking the recipes in the book, however, the streets of the city come alive in your kitchen as the spices z’atar, sumac, and cumin charge the air with their unique aromas. Written for the dilettante chef interested in Israeli food, the recipes utilize authentic ingredients but remain simple enough for even the most novice of home cooks. Today, I made the Turkey Burger Recipe found on page 200. Without the sour cream based sauce, the turkey burger patties are completely gluten-free and paleo! With the sauce, they’re just all the more delicious. They only took me about 30 minutes to make from scratch (although they did create quite a few dishes to clean). Each burger’s varied flavors kept every bite interesting, and it took willpower for me to set just 3 of the 12 total aside for tomorrow’s work-day lunch!

Turkey & Zucchini Burgers with green onion & cumin, from Jerusalem

Ingredients:

For the patties:
1lb ground turkey
1 large zucchini, coarsely grated
3 green onions, thinly sliced
1 large egg
2 tbsp chopped mint
2 tbsp chopped cilantro
2 cloves garlic, crushed
1 tsp ground cumin
1 tsp salt
1/2 tsp ground black pepper
1/2 tsp cayenne pepper (ommitted when I made them. Cayenne is a nightshade).
olive oil for pan searing

For the sauce (optional. Do not include if you’d like to eat Paleo):
1/2 cup sour cream
2/3 cup greek yogurt
1 tsp grated lemon zest
1 tbsp freshly squeezed lemon juice
1 garlic clove, crushed
1.5 tbsp olive oil
1 tbsp sumac
1/2 tsp salt
1/4 tsp black pepper

Instructions:
First, make the sour cream sauce by placing all the ingredients in a small bowl. Stir well and set aside or chill until needed.

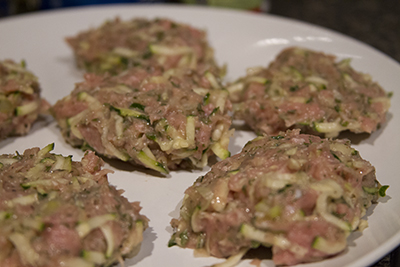
Preheat the oven to 425 degrees. In a large bowl, combine all the ingredients for the meatballs except the oil. Mix with your hands and then shape into about 18 burgers (I made 12).

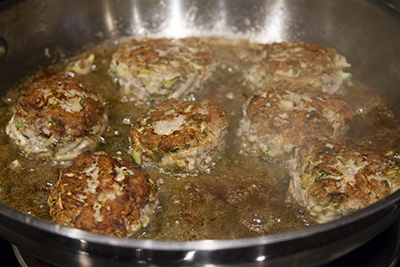
Pour the oil into a large frying pan to form a layer about 1/8 inch thick. Heat the oil over medium heat until hot, and sear the meatballs in batches on all sides. Cook for about 4 minutes on each side until golden brown.

Transfer the seared meatballs to a baking sheet lined with wax paper (I just sprayed it with olive oil. Ran out of wax paper last week!). Place in the over for 5-7 minutes. Serve warm, with sauce if desired.

IMG_8868

IMG_8859

Recipe: Gluten-Free Breakfast Sandwiches

1010518_10151415904311396_809023328_nI don’t know about you, but I am NOT a morning person. I never was, and I highly doubt I ever will be (despite assurances from my parents that all people become morning people once they get paying jobs). So I rarely rise early enough to adequately style my hair and spare the general public its natural gruesomeness, much less to prepare a healthy breakfast! These days, rather than simply adjusting my sleeping schedule and adopting a more adult-like approach to my mornings, I strive to create easy, on-the-go, gluten-free options for my mornings.

Last week, I made blueberry muffins for every day of the work week (Mentioned in my review of Namaste Mixes). While these were certainly delicious and put me in a positive mood, I did feel slightly guilty eating what was more-or-less cake for breakfast every day. So, I decided to brainstorm some healthier breakfast ideas. As I generally do, I tried to remember what my eating habits were like before my recent lifestyle changes. Before I got sick, I used to buy those Jimmy Dean’s Breakfast Sandwiches (the Lite ones, of course), and heat them in the microwave while brushing my teeth. As soon as the microwave would ‘ding!’, I’d be scrambling out the door and rushing to the bus (likely having forgotten some book or paper). I remembered that all you needed to do was wrap these pre-packaged sandwiches in a paper towel, heat them for two minutes, and voila! Breakfast on the go! So, I decided to attempt to emulate these sandwiches with gluten-free biscuits. I hope this recipe proves helpful to you, friend 🙂 It was a delicious way to start the morning today!

Gluten-Free (and Nightshade/Corn/Vinegar/Canola Oil Free) Egg and Cheese Breakfast Sandwiches! (Makes 3 sandwiches)

Ingredients:
1.5 cups Gluten-Free Biscuit Mix (I use Namaste because of my additional allergies, but I know Pamela’s Gluten-free mixes has a biscuit mix and is more readily available. Any gluten-free pie-crust mix or high-protein flour mix recipe would be fine as well. Check out the Gluten-Free 101 section for more info on high-protein mixes).
3 tbsp. Butter
1 tsp. Baking Soda
1/3 cup water

3 Egg
3 Slices of Cheese
Any extra ingredients you might like to include with your egg patty
Salt and Pepper

Directions: Bake the Biscuits
I followed the directions on the Namaste Mixes bag, which I will reproduce for you if you do not have directions on the mix you’re using:
Preheat oven to 425 degrees. Combine Mix and Baking soda, and add a pinch of salt and any other herbs you’d like to include in your biscuits. Slice 3tsp of butter into small chunks, and then cut into flour mix. I generally use my hands and just squeeze the butter into the mix (it’s easiest). Combine water and egg in a separate bowl, whisk until frothed. Pour wet ingredients into flour mix, and stir until just combined (you don’t want to combine the ingredients too well). Grease a baking sheet, and put some flour on your fingers to more easily manipulate the dough. Spoon dough onto greased sheet and form into discs 2-3 inches in diameter (I get about 6 discs out of a recipe). Bake for 8-10 minutes, until biscuits have browned. Note: These biscuits do not rise much, so while the recipe can make 6 biscuits, you’ll likely need to use 2 per sandwich.

For egg/cheese patty: You’ll need some type of mold to shape your egg into a circle. I have a silicone circle created for the purpose of molding eggs into a circle. This clever site suggests an onion ring!

Silicone Egg Ring:

Or This clever site suggests an onion ring!
Onion Ring:

The Best Onion Ring Sunny-Side Up Eggs Recipes We Can Find

I made my egg patty from scrambled eggs, because I intended to freeze these sandwiches for easy reheating. Scramble one egg per sandwich (3 eggs total for this recipe), and include salt and pepper in scrambled egg. Pour egg into egg mold in a pan set to medium-low heat, and cover the pan (otherwise the top will not cook). Once the top is cooked, sprinkle some shredded cheese, cook for another minute. Use a spoon to push the egg patty onto one biscuit. Cover with another biscuit, and enjoy!

To Freeze and Reheat: Wrap the finished sandwich in plastic wrap until sealed. Put this wrapped sandwich in a Ziploc bag, and store in the freezer until ready (sandwiches should hold for a week). To reheat, remove the sandwich from the plastic wrap, wrap in a paper towel, and heat in the microwave for two minutes. Then, run out of your house because you’re already 15 minutes late for work, and enjoy!

Recipe: Salted Caramel Ice Cream


IMG_8648

So, there are very few desserts that are naturally gluten-free. And even if you can replicate them in gluten-free form, you generally burn off all the calories you’re hoping to consume with the effort. I don’t know about you, but sometimes I’d just love something to indulge in that requires minimal effort. After raking my lazy brain for possible ways around having to bake elaborate gluten-free desserts for that late night quick-fix, I determined that ice cream would probably be the best choice for satisfying my lazy, gluten-free sweet tooth. However, as I scoured the shelved (even of Whole Foods) for gluten-free, nightshade-free, corn-free, and additive-free ice cream and ice cream alternatives, I came up empty time and again. The only place I was able to find ice cream that had no strange ingredients (like dextrose, maltodextrose, or guar gum), was Fresh Market, and all they had was Vanilla! So, I resolved to make my own ice cream out of sheer stubbornness. After confirming that milk did NOT give me hives (horray!) and receiving a generous gift of a $50 ice cream maker from my mom (who was thrilled to help me along the path to good health!), I searched for a recipe for one of my favorite ice-cream flavors: Salted Caramel.

Oh. My. Goodness. It was delicious.

If you remember to freeze the mixing bowl the night before, ice cream takes about 40 minutes to make total. First, you have to create a flavor syrup on the stove by melting ingredients and mixing them with some heavy cream. This process takes about 15 minutes and is kind of stressful, since you really need to act quickly to hit the sweet spot in terms of your syrup’s cooking time. Then, you add all remaining recipe ingredients to the syrup, and set it to cool in the fridge for about 2 hours (I set mine in the freezer for about 15 minutes at the end of that 2 hour period to assure extra coldification…<- totally a word). Once your mixture is very cold, you pour it into the ice cream machine, let it churn for 20 minutes, and then either eat it as a soft serve consistency or put it in the freezer to firm up (both are delicious). I thought it was pretty easy to do, and the results were freaking fantastic! I’ll list the recipe I found online, and I’ll be writing a review of an ice cream book that I use in the future (along with a review of must-have appliances for constant at-home cooking).

Enjoy!

Salted Caramel Ice Cream

Ingredients

  • 1 1/4 cups sugar, divided
  • 2 1/4 cups heavy cream, divided
  • 1/2 teaspoon flaky sea salt such as Maldon
  • 1/2 teaspoon pure vanilla extract
  • 1 cup whole milk
  • 3 large eggs
  • Equipment: an ice cream maker

Instructions

Heat 1 cup sugar in a dry 10-inch heavy skillet over medium heat, stirring with a fork to heat sugar evenly, until it starts to melt, then stop stirring and cook, swirling skillet occasionally so sugar melts evenly, until it is dark amber.

Add 1 1/4 cups cream (mixture will spatter) and cook, stirring, until all of caramel has dissolved. Transfer to a bowl and stir in sea salt and vanilla. Cool to room temperature.

Meanwhile, bring milk, remaining cup cream, and remaining 1/4 cup sugar just to a boil in a small heavy saucepan, stirring occasionally.

Lightly whisk eggs in a medium bowl, then add half of hot milk mixture in a slow stream, whisking constantly. Pour back into saucepan and cook over medium heat, stirring constantly with a wooden spoon, until custard coats back of spoon and registers 170°F on an instant-read thermometer (do not let boil). Pour custard through a fine-mesh sieve into a large bowl, then stir in cooled caramel.

Chill custard, stirring occasionally, until very cold, 3 to 6 hours. Freeze custard in ice cream maker (it will still be quite soft), then transfer to an airtight container and put in freezer to firm up.

Link to the original recipe:  http://www.epicurious.com/recipes/food/views/Salted-Caramel-Ice-Cream-354517#ixzz2Ujy4CTtM

Recipe: Paleo Pecan Crusted Baked Salmon

IMG_8647

Hello Readers! Sorry for the gap in posting, I’ve been preoccupied with learning a new programming language :] That, and I got a little tired of cooking elaborate meals every night. So, I took a break and subsisted on plain baked chicken and broccoli. I do have some very exciting news for you! In the past 10 days, I’ve been able to successfully add milk, chocolate, and coffee back into my diet! Needless to say my sweet tooth is very grateful. I’ve also been able to definitively identify potatoes as a major instigator of my hives and vinegar (seemingly all types) as a second culprit. So it has been an eventful few weeks for me! I did start keeping a food journal (which helped me pinpoint vinegar as a problem), and I’ve actually found it to be a somewhat enjoyable hobby to track my food intake. I guess that shows you how exciting of a person I am 😉

Anyway, I’ve got lots of recipes to post! The picture above is of Pecan Crusted Baked Chicken with a vinegar-less honey-mustard seasoning. It came out very sweet (due to the lack of vinegar), and still requires some tweaking. I ended up trying to add a ton of salt to make up for the lack of vinegar, but the dish was still overpowered by the sweetness of the honey. It was, never-the-less, delicious, although pallets without a proclivity for sweets might not enjoy it as much. Rather than posting the recipe for this one, I think I’ll try to remake it with better results. Look forward to the update! 😀