Tips and Guides: Essential Kitchen Equipment

For a lot of people, adopting a gluten-free lifestyle doesn’t simply mean changing what you cook. In a world where most of us grow up buying quite a few meals out each week, it often means learning HOW to cook. When I started the gluten-free diet, I wasn’t very far from this point. I could cook a pretty decent variety of chicken recipes, but that was it. And then one day, all of the doors to eating delicious, professionally prepared, and exotic foods slammed shut before my eyes. As a foodie, I paniced; food is almost a passion of mine. In college, while my friends spent their money buying motorcycles or beer, I spent any extra cash I had trying new and delicious types of food. Woefully, I mourned the Mediterranean, Middle Eastern, Asian, and European dishes that I would never have the opportunity to try.

And then that same stubbornness that helped me to discover the underlying causes of my health problems resurfaced, and I said to myself “Hey, I’m sure I can learn to cook these dishes that professional chefs spend their careers perfecting in just one night!”

Well, that’s not exactly how things panned out, but I have been able to satisfy my foodie-alter-ego well enough 🙂 Throughout the course of learning how to cook more complex meals (and learning to simply cook every day), I’ve collected a few Must Have Kitchen Tools that I think newbie cooks might like to know about.

A Good Knife:

31c2gxxpgLL._SL400_ 
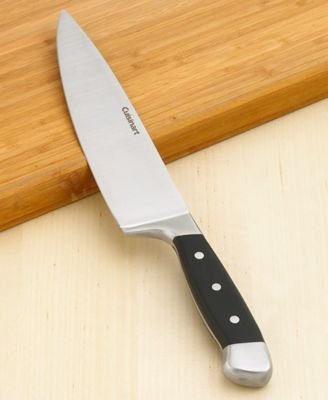
A good Chef’s Knife is really non-negotiable. I remember when I was in high-school and just learning to cook chicken on my own, all I had at my disposable were the worst of the worst quality steak knives. It was so difficult to cut/chop anything that I quickly understood why my mom hated cooking so much. Then, in college, I had the opportunity to use a larger knife. While that one still wasn’t great, it was dramatically easier to prepare foods. I decided to buy a set of knives from the houseware sale site http://www.housewaresdeals.com/. I spent $80 on what had been a $200 set of Cuisinart Knives (Chef’s Knife pictured to the left). While the folded-steel set has served me fairly well (it sharpens fairly well), I wish I had simply invested the $80 into a single, professional quality Chef’s Knife. You can find Chef’s Knives in Publix that should do the trick for $10. But to get a really wonderful knife, $100 is about entry level (to buy at a retail store, at least). I know that seems like a lot, but it makes a WORLD of difference. Sharper knives are safer (less slippage), cut faster, and require much less effort.

A Food Processor

cuisinart-food-processor1-300x300
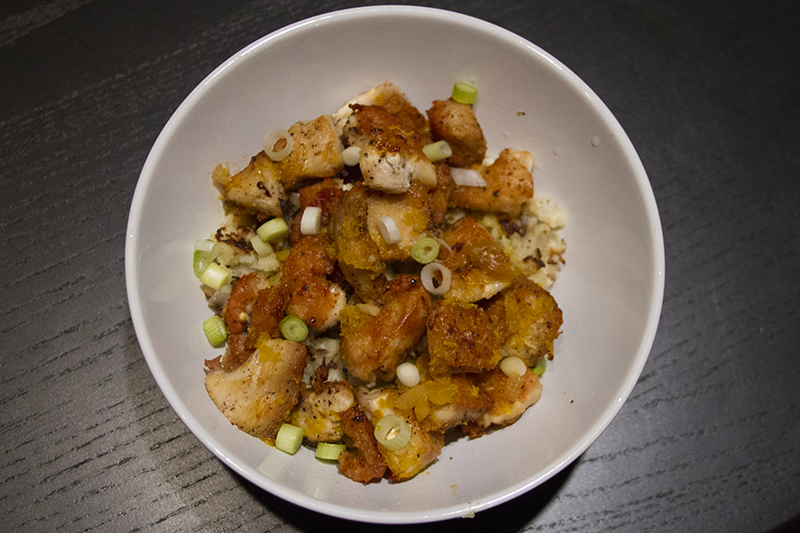
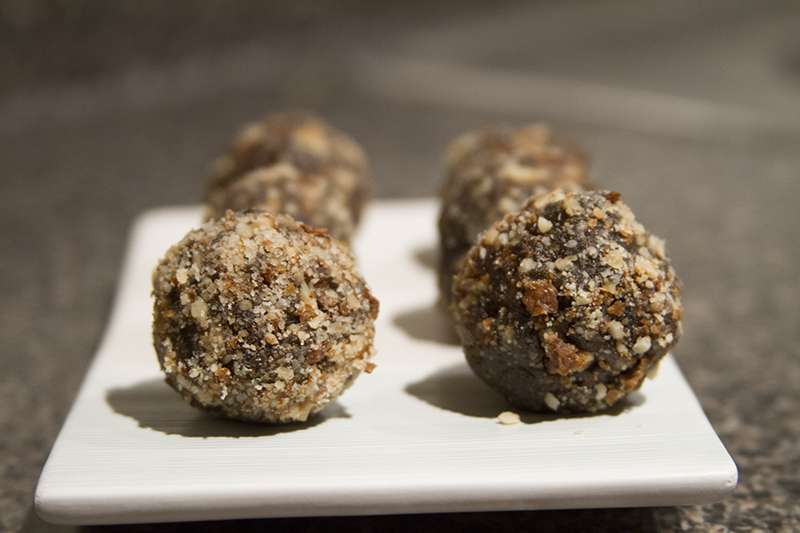
However, even if you have a great knife, chopping 2-5 veggies every night probably adds 30 minutes of prep time a day. Over time, this adds up! So a food processor is a great way to save time for every day use. However, convienence aside, you actually need a food processor for making things like almond butter, Paleo Date Balls (see recipes), condiments, and a handful of other food items that require very thorough blending. A food processor can chop/blend something in seconds. I got by just fine without one for months, but now you’d have to fight me to take mine away :] I’ve linked the one I chose in the picture on the left. This one is probably the most popular model, which means interchangeable parts are easy to access.

An Apartment Friendly Grill:

Calphalon-Kitchen-Electrics-5-in-1-Removable-Plate-Grill
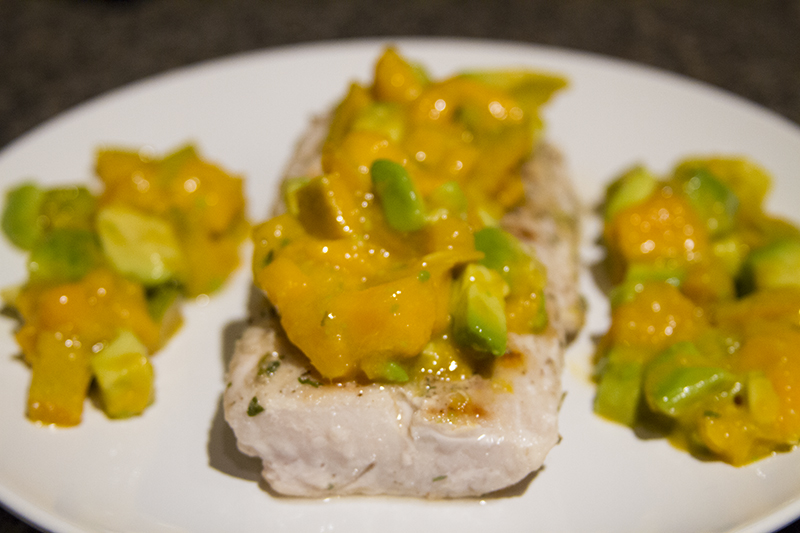
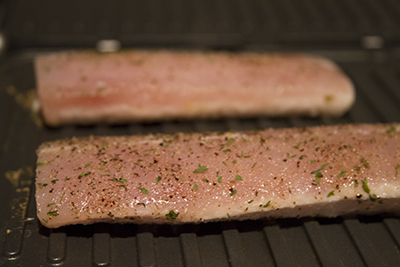
If you’re lucky enough to live somewhere that allows you to have a real grill (and you have one), this won’t apply to you. However, the only grill options available to me are publicly used, meaning they’re likely covered in gluten, corn, and nightshade particles (all of which I’m allergic to)! After coming across so many delicious sound recipes that required grilling, I decided that I’d had enough and bought the most apartment friendly grill I could find. The one I chose (pictured to the left) is sort of like a robust George Foreman Grill: it has detachable plates for easy cleaning, it can open all the way up to provide 2 grilling surfaces, it’s got a variety of heat settings, and it doubles as a breakfast griddle. Needless to say, I absolutely love it. I use it at least 2 times a week on nights when I’m just too tired to do anything too fancy. All you have to do is heat the grill up, throw on a piece of meat or some chopped zucchini, and sit back and watch as your Calphalon Grill produces perfect grill lines and drains away excess fat. Highly Recommended! (If you sign up for the e-mail list at Bed Bath and Beyond’s website, you’ll get a 20% off coupon that you can use toward this! Pretty significant savings!)

PS: While Cuisinart’s Counter Top Grill has WAY more reviews than the Calphalon model, this model seemed far superior in form, functionality, and build quality.

A Stainless Steal Skillet:

skillet2 If your going gluten-free, you need to get rid of any scratched non-stick cook/bakeware you have. As soon as the non-stick coating is permeated, gluten seeps under the coating and can contaminate your food. Since you won’t know how sensitive you are when you first start, it’s best to just buy one new pan to eliminate false-positives. You can use either buy new non-stick pans (although you won’t be able to share these with anyone, and should someone accidentally use it you’ll have to start all over), Stainless Steel or Ceramic. Stainless Steel and Ceramic are washable, meaning you can remove the gluten with a good, clean scrubbing. Stainless steel is probably the best of the three options for quality, since stainless steel heats rapidly and evenly. This ensures well, evenly cooked food. However, my 12inch stainless steel skillet is SUPER heavy, to the point where it’s almost dangerous when I’m trying to pour things out of the skillet. I have to say that it is worth it (the skillet cooks food SO well), but it’s definitely a downside. Make sure you spray the skillet every time, because food WILL stick to it (even if you pour oil in).

These are the necessity appliances that I’ve collected so far. I also have an ice cream machine, and I hope to collect a cake-pop maker and a mini-doughnut maker eventually (http://thebabycakesshop.com/products/donut-makers/dn-76r). Multiple food allergies rule out even gluten-free store bought donuts (the only ones I can find use potato starch 😦 ). Perhaps I’ll make a separate “Dessert Appliances” post down the road. I hope this helps!

Product Review: Paleo Hail Merry Tarts and Macaroons (Not the French Kind)

mixed6tarts3_1

After searching far and wide for a store-bought, easy to eat Paleo dessert, I could only find two products. Thankfully, they’re both DELICIOUS! These “Miracle Tarts” by Hail Merry are a life saver when you’ve got a hankering for something sweet. At about $5 a pop, they’re probably not going to become an every day snack item, but will definitely leave you feeling satisfied. It’s actually hard to know that they’re Paleo desserts (perhaps the tart crust is the only thing that barely gives it away). The “custard” in the center is creamy and delicious no matter what flavor you try (the chocolate tart is astonishingly good), and the variety of flavors is wonderful. I’ve even brought these into restaurants with me so my dining companions can order their glutenated desserts without feeling guilty while I chow down! I buy these at Whole Foods, but the company does offer online ordering for anyone who doesn’t have local access. I promise, if you check one of these out, you won’t be disappointed!

Taste: 5/5

Price: $5 (for the quality and convenience, I’d happily pay this)

Texture: 4/5 (All around delicious, and the cream gets a 5/5. The ‘crust’ is a bit too crumbly, which is what earns this tart a 4/5. However, the crust is also absolutely delicious!)

Recipe: Salted Caramel Ice Cream


IMG_8648

So, there are very few desserts that are naturally gluten-free. And even if you can replicate them in gluten-free form, you generally burn off all the calories you’re hoping to consume with the effort. I don’t know about you, but sometimes I’d just love something to indulge in that requires minimal effort. After raking my lazy brain for possible ways around having to bake elaborate gluten-free desserts for that late night quick-fix, I determined that ice cream would probably be the best choice for satisfying my lazy, gluten-free sweet tooth. However, as I scoured the shelved (even of Whole Foods) for gluten-free, nightshade-free, corn-free, and additive-free ice cream and ice cream alternatives, I came up empty time and again. The only place I was able to find ice cream that had no strange ingredients (like dextrose, maltodextrose, or guar gum), was Fresh Market, and all they had was Vanilla! So, I resolved to make my own ice cream out of sheer stubbornness. After confirming that milk did NOT give me hives (horray!) and receiving a generous gift of a $50 ice cream maker from my mom (who was thrilled to help me along the path to good health!), I searched for a recipe for one of my favorite ice-cream flavors: Salted Caramel.

Oh. My. Goodness. It was delicious.

If you remember to freeze the mixing bowl the night before, ice cream takes about 40 minutes to make total. First, you have to create a flavor syrup on the stove by melting ingredients and mixing them with some heavy cream. This process takes about 15 minutes and is kind of stressful, since you really need to act quickly to hit the sweet spot in terms of your syrup’s cooking time. Then, you add all remaining recipe ingredients to the syrup, and set it to cool in the fridge for about 2 hours (I set mine in the freezer for about 15 minutes at the end of that 2 hour period to assure extra coldification…<- totally a word). Once your mixture is very cold, you pour it into the ice cream machine, let it churn for 20 minutes, and then either eat it as a soft serve consistency or put it in the freezer to firm up (both are delicious). I thought it was pretty easy to do, and the results were freaking fantastic! I’ll list the recipe I found online, and I’ll be writing a review of an ice cream book that I use in the future (along with a review of must-have appliances for constant at-home cooking).

Enjoy!

Salted Caramel Ice Cream

Ingredients

  • 1 1/4 cups sugar, divided
  • 2 1/4 cups heavy cream, divided
  • 1/2 teaspoon flaky sea salt such as Maldon
  • 1/2 teaspoon pure vanilla extract
  • 1 cup whole milk
  • 3 large eggs
  • Equipment: an ice cream maker

Instructions

Heat 1 cup sugar in a dry 10-inch heavy skillet over medium heat, stirring with a fork to heat sugar evenly, until it starts to melt, then stop stirring and cook, swirling skillet occasionally so sugar melts evenly, until it is dark amber.

Add 1 1/4 cups cream (mixture will spatter) and cook, stirring, until all of caramel has dissolved. Transfer to a bowl and stir in sea salt and vanilla. Cool to room temperature.

Meanwhile, bring milk, remaining cup cream, and remaining 1/4 cup sugar just to a boil in a small heavy saucepan, stirring occasionally.

Lightly whisk eggs in a medium bowl, then add half of hot milk mixture in a slow stream, whisking constantly. Pour back into saucepan and cook over medium heat, stirring constantly with a wooden spoon, until custard coats back of spoon and registers 170°F on an instant-read thermometer (do not let boil). Pour custard through a fine-mesh sieve into a large bowl, then stir in cooled caramel.

Chill custard, stirring occasionally, until very cold, 3 to 6 hours. Freeze custard in ice cream maker (it will still be quite soft), then transfer to an airtight container and put in freezer to firm up.

Link to the original recipe:  http://www.epicurious.com/recipes/food/views/Salted-Caramel-Ice-Cream-354517#ixzz2Ujy4CTtM

Recipe: Paleo Pecan Crusted Baked Salmon

IMG_8647

Hello Readers! Sorry for the gap in posting, I’ve been preoccupied with learning a new programming language :] That, and I got a little tired of cooking elaborate meals every night. So, I took a break and subsisted on plain baked chicken and broccoli. I do have some very exciting news for you! In the past 10 days, I’ve been able to successfully add milk, chocolate, and coffee back into my diet! Needless to say my sweet tooth is very grateful. I’ve also been able to definitively identify potatoes as a major instigator of my hives and vinegar (seemingly all types) as a second culprit. So it has been an eventful few weeks for me! I did start keeping a food journal (which helped me pinpoint vinegar as a problem), and I’ve actually found it to be a somewhat enjoyable hobby to track my food intake. I guess that shows you how exciting of a person I am 😉

Anyway, I’ve got lots of recipes to post! The picture above is of Pecan Crusted Baked Chicken with a vinegar-less honey-mustard seasoning. It came out very sweet (due to the lack of vinegar), and still requires some tweaking. I ended up trying to add a ton of salt to make up for the lack of vinegar, but the dish was still overpowered by the sweetness of the honey. It was, never-the-less, delicious, although pallets without a proclivity for sweets might not enjoy it as much. Rather than posting the recipe for this one, I think I’ll try to remake it with better results. Look forward to the update! 😀

Predicting the Hives

I just wanted to send a brief update to anyone who follows this blog for the story of my health struggles. I’ve found a way to predict the hives!

I had outbreaks twice in the last five days; one on Friday when I experimented with eating potatoes, and one on Sunday as an accidental glutening or undetermined allergen. Both times, the hives broke out approximately 12 hours after the suspected food perpetrator. However, 6-10 hours after eating the food perpetrator, I developed moderately painful headaches! I think I will use this discovery to time when I take antihistamines in the future. (Don’t worry, the breakouts (while significant) were short lived, thanks to a new antihistamine called xyzal that I take after I get a breakout.)

I wanted to share this incase anyone else might be able to use their headaches as indicators of an early allergic reaction. Come to think of it, I was getting increasingly common and painful migraines before my health really took a dive. I guess I’ve just finally been able to put two and two together!

Good luck to all of you,

Kim

Product Review: Two Moms Nut Bars (Paleo)

nutbar-banner_1024x1024

These nut bars are livesavers for when you find yourself hungry in the middle of a busy work day. I don’t seem to have any reaction to them, and they’re tasty! The nuts are seasoned and stuck together with agave nectar. At 130 calories, they’re the perfect snack to get you to your next meal. I should note that you should go easy on the nuts if you’re starting out on a Leaky Gut diet (or in general). Nuts contain Phytate, an enzyme that inhibits digestion (this can cause diarrhea in large enough amounts). I’ve been able to handle 2 in a day pretty well, but I’m not tempting fate by eating more than 2. I buy these at Whole Foods, but you can find them online as well! For discounts, check out vitacost.com, or order directly from their website (linked in the photo above. Yes, I did snag that photo from their site. I just thought the text was cool :] ).

Price: $4

Taste: All flavors taste pretty much the same to me, but the seasoning (cinnamon seems to be the predominant flavor) is delicious!

Texture: These bars are ‘chewy’, with the nuts adhering together with sweet agave nectar.

Quick Update

Sorry for not posting in a few days, readers. I was conducting an experiment with Potatoes. Let’s just say I won’t be any Potatoes again anytime soon 😉 

Symptoms from Potato Ingestion: Headache (6-8 hours after) followed by Hives (12 hours after). 

Also, I received a message from a friend earlier today that mentioned how much my story had helped one of her relatives. I just want everyone to know that that’s why I keep this blog. I wanted to share with everyone not only the solution to my hives, but how I’ve grappled with the various challenges of my considerable lifestyle changes. I hope more of you find hope here 🙂


Kim

Recipe: Paleo Orange Chicken

IMG_8530

One of the first things that I made for myself when I went gluten free was orange chicken. Now that I’m forced to restrict my diet even further, I needed to re-imagine one of my favorite dishes in the spirit of my great great great great great great ^ 20th grandparents (ie: the cavepeople, to be politically correct). And I have to say, it came out surprisingly well. I don’t think I’ll use coconut oil for sauteing the chicken and moistening the Cauli-Rice (‘rice’ made from cauliflower) again, because the coconut flavor that penetrated the entire dish was a little distracting. Unfortunately, coconut oil/mana/aminos/flour are staples of the Paleo diet, so my life long aversion to the flavor simply has to go. Aside from being unable to fry the chicken (since I wasn’t able to coat it in anything), I thought the dish came out pretty well. The Cauli-Rice was surprisingly delicious, with a pretty memorable omage to your local hibachi place’s fried rice. The chicken achieved an interesting crunchyness when fried in the coconut oil. I would add a bit more garlic in next time. I had intended to use a garlic paste that’s in my refrigerator, but, as a relic of my less healthful days, it was chock full of ingredients that are strictly prohibited on my new diet. Anyway, enjoy!

Paleo Orange Chicken

Ingredients:

For Chicken:

2 Oranges, Juiced

Zest of 1 Orange

2 Chicken Breasts (using dark me would be more reminiscent of real orange chicken, but I used breast since it’s what I had)

2 Cloves Garlic, Minced

Chilli Powder (Optional)

3 Tbsp Coconut Aminos (soy sauce replacement)

3 Green Onions, Chopped

1 Tsp Ginger, Minced

For Cauli-Rice:

1 head of Cauliflower, chopped or processed in a food processor to be the size of rice grains (two pulses per floret in my magic bullet!)

Half a White Onion, Chopped

Salt and Pepper to taste

Garlic Powder

Instructions for Chicken: In a medium size sauce pot, add the orange juice, zest, ginger, coconut aminos and chili garlic sauce or sriracha. Set over medium heat and let simmer to reduce and thicken while the chicken cooks. In a saute pan, heat 3 T of the fat of your choice, over medium high heat. Add the chopped chicken thighs and cook until a nice brown crust has developed on the chicken pieces, about 6 minutes. Add the chicken to the sauce pot and stir to coat with the orange sauce. Serve topped with sliced green onions.

Instructions for Rice: Place a small sauce pan over medium heat, melt 2 Tbsp of coconut oil. Add onions and cook until clear. After onions are finished cooking, add Cauli-rice. Season with salt, pepper, and garlic powder. Serve with chicken. (I think the rice tastes better with a little browning in parts, so don’t be afraid to increase the heat a bit).

Enjoy!

Recipe: Paleo Date Ball Dessert

IMG_8524

As I mentioned in my previous post, it’s quite a challenge to incorporate sweets into my diet these days (especially easily acquired sweets!). This is probably a good thing, but it didn’t stop me from figuring out a loop hole! I really will be a great lawyer, won’t I? These sweet treats (which my non-Paleo boyfriend also enjoyed quite a bit) are a great way to satisfy that sugar craving while staying on track. Note: you will need a blender/magic bullet/food processor for this one.

Goodness Gracious Date Balls of Fire! *credit to Ruben

Ingredients:

5 Dates, pits removed

1/4 tsp Cinnamon

Walnuts, chopped (the ones I used were seasoned in Cinnamon and Misquite Pod. Mmm.)

1/4 tsp Vanilla

Instructions:

Chop the walnuts in the processor before adding anything else, then remove. Then, combine all ingredients in food processor, blend until smooth-ish. Role in to balls, and enjoy! If you’d like, you can coat them in the walnut powder that is likely left behind (pictured above). Feel free to experiment with different ingredients!

Recipe: Paleo Mahi Mahi with Mango Avocado Salsa

IMG_8522

Finding ways to satisfy my powerful sweet tooth is one of the main challenges of my hyper-restrictive diet. So when the idea to create Mango Salsa hit me out of the blue in the middle of work (at 11am, no less), I spent the whole day dreaming of my future creation. It turned out to be every bit as delicious as I had hoped! This dish is very rich in healthy fats and oils, including Omega-3 (Mahi), Omega-6 (Avocado), and Folate! It definitely hit the spot after a week straight of eating salt-and-pepper chicken (bleh!). I’ve also recently purchased an indoor electric grill designed specifically for apartment dwellers. It’s been a wonderful addition to my cooking tools, and I’d highly recommend one to anyone who is also bound by lease rules! (I’ve linked the model that I bought, which I’m very happy with, below).

For Salsa:

1 Mango, Diced (you could peel it, but It didn’t make much of a difference to me. Besides, there are tons of nutrients in fruit skins!)

1.5 Avocado, Peeled and Diced (I had small ones, hence the .5)

Juice from 1 Lime

Fresh Cilantro (I had to used dried, because the store was out. But use fresh, the flavor is much more potent).

Minced Garlic

Salt to Taste

Instructions: Combine all Ingredients (easy enough!)

For Mahi Mahi:

2 6oz portions of Mahi Mahi

Cilantro Leaves

Garlic

Salt and Pepper

Instructions: Season fish with ingredients as desired (I’d recommend emphasizing the Garlic most of all. It comes through nicely with the salsa). ‘Grill’ fish on 350 degree grill top for 5 minutes on each side. Fish is delicate, so be careful!

Indoor Grill: http://www.amazon.com/Calphalon-Kitchen-Electrics-Removable-Plate/dp/B008P47F6K/ref=pd_sim_sbs_k_2 (I know the Cuisinart version of this has many more reviews, but upon examining them side by side, this one seems to have a far superior build. Plus the feature that allows you to open the grill entirely up and have 2 cooking surfaces puts this one over the top.)

IMG_8521